As furniture ages, it can lose its luster and shine. Waxing can help to bring furniture back to life, but preparing the surface properly beforehand is crucial to achieving the best results. The process of preparing furniture for waxing may seem daunting, but with the right tools and techniques, it can be straightforward and rewarding. In this article, we will explore the step-by-step process for preparing your furniture for waxing, including how to clean the surface, repair any damage, choose the right wax and apply it properly, cure the wax, and finally, buff the surface to achieve a high shine.
Clean the Surface
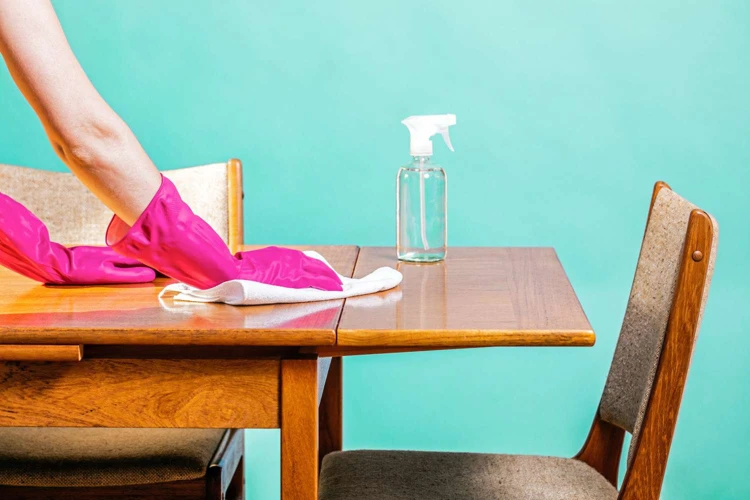
As you prepare to wax your furniture, it is important to start with a clean surface to ensure a smooth and polished finish. Cleaning the surface doesn’t just mean removing obvious dirt and dust, but also removing any obstacles that could interfere with the waxing process. In this section, we will discuss the steps for thoroughly cleaning your furniture surface, from dust and dirt removal to a deep cleaning. A clean surface will help the wax adhere better and give you a finish that will last longer. For more information on the benefits of waxing your furniture, check out our article on why waxing is important for your furniture.
Remove Any Obstacles
When preparing your furniture for waxing, it’s important to remove any obstacles that may get in your way during the cleaning process. This means taking off any drawers or doors and setting them aside in a safe place. Use a table below to keep track of the removed pieces.
| Item | Location |
|---|---|
| Drawer 1 | Left side |
| Drawer 2 | Right side |
| Door 1 | Top left |
| Door 2 | Bottom right |
Removing obstacles ensures that you have full access to the surface of your furniture and can clean and wax every inch of it without any hindrance. This step is especially important if your furniture has any intricate details or hard-to-reach areas.
Note: If you notice any damage while removing these pieces, like a loose screw or a missing handle, be sure to repair it before proceeding with the waxing process. For more information on furniture waxing, check out this waxing beginner’s guide.
Dust and Dirt Removal
When preparing furniture for waxing, it’s crucial to start with a clean surface. Dust and dirt can create a barrier between the wax and the wood, preventing proper adhesion and resulting in an uneven finish. Here are some steps for effective dust and dirt removal:
| Step 1: | Remove any objects from the surface of your furniture. This includes lamps, picture frames, vases or any other decorative items that may get in the way during the cleaning process. |
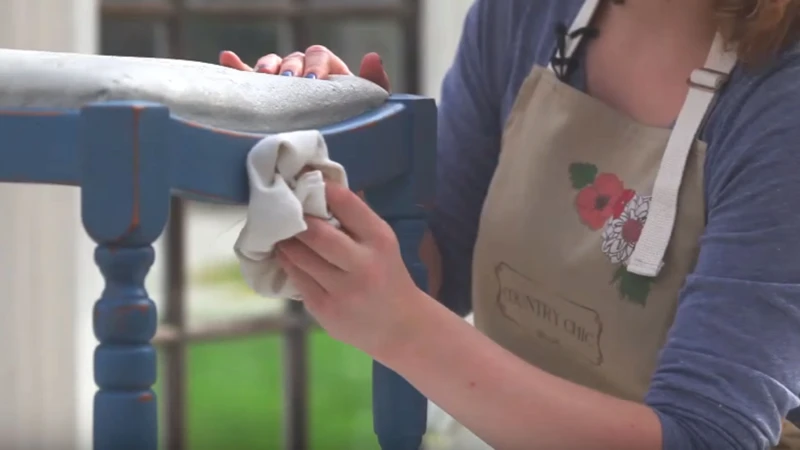
| Step 2: | Using a soft-bristled brush or a dry cloth, gently remove any dust and surface dirt from your furniture. It’s important to avoid using water at this stage as it can lead to unnecessary damage, especially if dealing with untreated wood. |
| Step 3: | For stubborn dirt or grime that won’t come off easily, you can use a slightly damp cloth or a specialty wood cleaner. Be sure to test the cleaner in an inconspicuous area first to make sure it doesn’t cause any unwanted effects on your furniture. If you have any doubts, it’s always best to seek professional advice. |
| Step 4: | Once you have removed all the dirt and dust, leave your furniture to dry completely before moving on to the next step of the waxing process. This might take a few hours depending on the humidity and temperature. |
By following these steps, your furniture will be in the best condition possible for receiving a wax coating. However, before waxing, make sure to check your furniture for any signs of damage such as holes, cracks or splits. Read on to the next section on how to repair these damages before moving on to the actual waxing process.
Deep Cleaning
When it comes to waxing furniture, the surface needs to be thoroughly cleaned before applying any wax. Deep cleaning the furniture ensures that any dirt and grime build-up is removed. This helps the wax to adhere properly to the surface, ensuring a smooth and long-lasting finish. Here are some steps you can follow:
| Step | Instructions |
|---|---|
| Step 1: | Start by removing any dust or loose dirt with a clean cloth or soft-bristle brush. Make sure to get into the crevices and corners of the furniture. Use a vacuum cleaner with a soft brush attachment to remove any remaining dust. |
| Step 2: | If the furniture has any stains or built-up grime, use a soap solution to clean it. You can use a mild soap and water solution or a specially formulated wood cleaner. Make sure to test the cleaner on a small, inconspicuous area before applying it to the entire surface. |
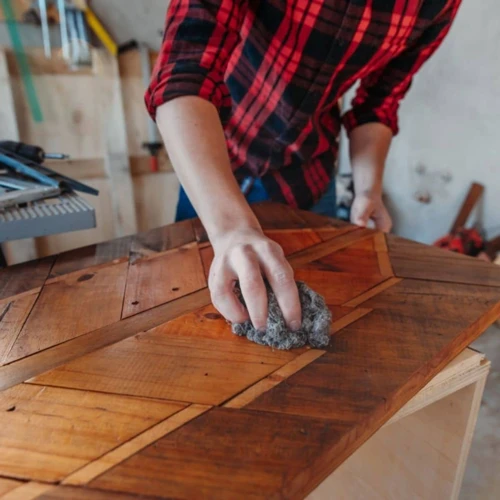
| Step 3: | If the furniture has any stubborn stains or marks, use a fine-grade steel wool to gently scrub the surface. Be careful not to scrub too hard or you may damage the finish. |
| Step 4: | Rinse the furniture with clean water and a clean cloth to remove any soap residue. Allow the furniture to dry completely before applying any wax. |
By following these steps, you’ll ensure that your furniture surface is properly prepared for waxing. A properly cleaned surface will help the wax adhere better and last longer. If you have any questions about the cleaning process or how to choose the right wax for your furniture, check out our types of household wax article. And remember, avoid common waxing mistakes by checking out our tips and tricks to wax furniture.
Repair Any Damage
It can be frustrating to discover damage on your furniture before you wax it, but don’t fret! There are ways to address these issues before prepping the surface for waxing. Whether you’re dealing with cracks, scratches or holes, it’s important to repair and restore your furniture before adding your wax coating. This will ensure a smooth finish and extend the life of your furniture. Let’s take a look at some techniques for repairing any damage.
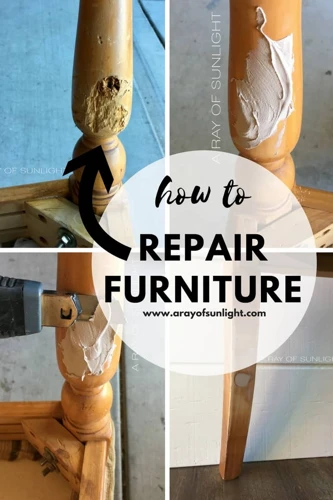
Filling Holes and Cracks
When preparing furniture for waxing, it’s important to start by filling any holes and cracks in the surface. This step is crucial not only for aesthetic reasons but also to ensure that the wax coating is applied evenly and smoothly. Here are some tips to help you with this step:
1. Assess the Surface: Before you start filling any gaps, assess the surface for any major structural damage or deep gouges. These will require more than just filling and should be repaired by a professional.
2. Choose the Right Filler: There are many types of fillers available, but for furniture waxing, it’s recommended to use a filler specifically designed for wooden surfaces. Select a filler that matches the color of your furniture or one that can be stained to match.
3. Apply the Filler: Using a putty knife or scraper, apply the filler into the hole or crack. Be sure to overfill slightly to allow for shrinkage during drying. Smooth out the surface as best you can.
4. Let It Dry: Allow the filler to dry completely according to the manufacturer’s instructions. This typically takes a few hours but can vary depending on the product and the size of the hole.
5. Sand the Surface: Once the filler is dry, it’s time to sand the surface. Use fine-grit sandpaper to gently sand the surface until it’s smooth and level with the surrounding area. Be careful not to sand too aggressively or you may remove the filler.
6. Clean the Surface: Wipe down the surface with a clean, dry cloth to remove any dust or debris created during the sanding process.
By taking the time to fill any holes and cracks in your furniture before waxing, you’ll be able to achieve a smooth, flawless finish. If you need help with the waxing process itself, check out our article on best application techniques for waxing. And don’t forget to maintain your furniture by waxing it periodically – check out our article on waxing furniture frequency for more information.
Sanding the Surface
Preparing the surface of the furniture for waxing is a vital step that ensures a smooth and even application of the wax. One of the crucial steps in prepping the surface is sanding it.
Firstly, inspect the furniture for any rough or bumpy areas. Lightly sand those areas to smooth them out, and then gradually work your way to the entire surface of the furniture, using a fine-grit sandpaper. The sandpaper should have enough grit to remove any old wax or finishes that remain on the furniture, yet gentle enough so as not to damage the furniture’s surface.
It is important to sand in the direction of the grain; this will prevent any scratches or imperfections on the surface of the furniture. Sanding the furniture will create the perfect surface for the wax to adhere to.
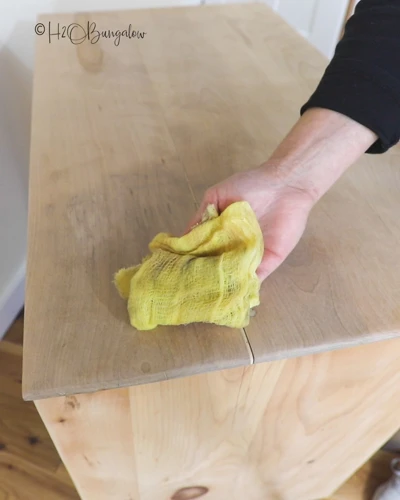
After sanding, use a tack cloth to remove any dust or debris from the furniture. You want the surface to be as clean as possible before applying the wax.
Remember, waxing and polishing are two different things. Sanding the surface to prepare it for waxing is not the same as polishing it. Polishing uses a different technique and materials to achieve a shiny surface; it does not involve removing any of the furniture’s material.
By following these steps, your furniture will be smooth, even, and ready for the wax application. For more DIY furniture waxing tips and tricks, visit here. If you want to add a pop of color to your furniture, we suggest using colored waxes to bring life back to your old furniture.
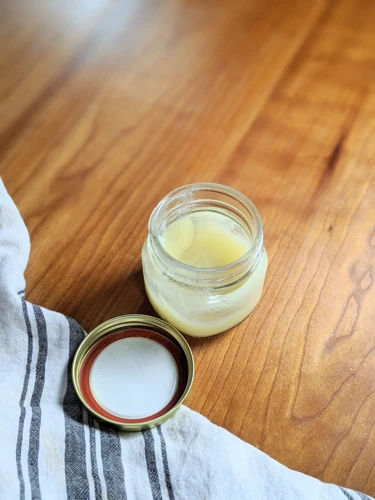
Choose the Right Wax
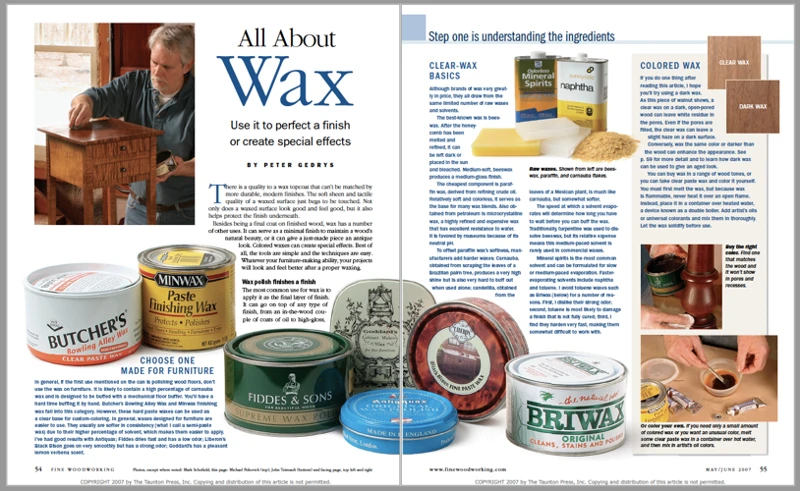
Selecting the appropriate type of wax is crucial to the outcome of your furniture’s condition after waxing. There are various types of waxes available, ranging from beeswax, carnauba wax, to polymer wax.
Beeswax is natural and non-toxic, making it a popular option. It protects the surface of the furniture and imparts a subtle sheen. However, it is not the most durable option available.
Carnauba wax, on the other hand, is a harder wax compared to beeswax, which makes it more resistant to scuffs and scratches. It provides a higher level of sheen and protection to the furniture surface but can be relatively tricky to apply.
Polymer wax is a synthetic wax that offers higher durability and longevity to the furniture surface. It imparts a mirror-like finish and offers better protection against water and heat. However, it is also the most challenging and time-consuming wax to apply.
When selecting the right wax, consider the furniture’s current condition, usage, and finish type. It is essential to choose the right kind of wax to ensure your furniture’s protection and longevity.
Apply a Base Coat
Now that you have properly cleaned and repaired your furniture, it’s time to apply a base coat. This is an essential step in achieving a quality waxed finish. The base coat serves as a foundation for the wax, ensuring that it adheres properly and evenly to the surface. Applying a base coat also helps to protect the wood and prolong the life of the finish. In this section, we will cover the important aspects of choosing the right base coat and the proper application techniques to achieve a flawless finish.
Choosing the Right Base Coat
When it comes to choosing the right base coat for your furniture waxing project, there are a few things you should keep in mind. Here’s a handy table to help you make the right choice:
| Type of Wood | Recommended Base Coat | Reasoning |
|---|---|---|
| Unfinished or Raw Wood | Shellac or Sanding Sealer | These types of base coats will help to seal the pores of the wood and provide a smooth, even surface for the wax to be applied. |
| Previously Finished Wood | Wood Conditioner | If the wood has been previously finished, a wood conditioner can help even out any unevenness or patchiness in the surface. This will help the wax to adhere more evenly and prevent a blotchy finish. |
| Painted or Varnished Wood | Strip the existing finish before applying the wax | Wax will not adhere well to a painted or varnished surface, so it’s important to strip the existing finish before applying a base coat and then the wax. This will ensure that the wax takes hold and lasts longer. |
Choosing the right base coat is critical to achieving the perfect finish. Use this table as a guide to determine the right base coat for your project based on the type of wood you are working with. And always remember to read the manufacturer’s instructions carefully before applying any product to your furniture.
Application Techniques
When applying the base coat to your furniture before waxing, following the proper techniques is crucial to achieving a smooth and even finish. Here are some application techniques to keep in mind:
- Apply in Thin Layers: Rather than applying a thick coat of base wax all at once, it’s better to apply several thin layers to allow the wax to fully absorb into the wood. This will also prevent any drips or bumps from forming.
- Use a Brush or Roller: While a cloth can be used to apply the wax, using a brush or roller will help ensure even application of the wax. Choose a brush or roller that is appropriate for the size of your furniture piece.
- Work in Sections: If you have a large furniture piece, work in smaller sections to ensure that each section is evenly coated. This will also prevent the wax from drying out before you’ve had a chance to buff it out.
- Apply in the Direction of the Grain: Always apply the wax in the direction of the wood grain to avoid streaks and ensure that the wax is absorbed into the wood more easily.
- Wait for Each Layer to Dry: Before applying an additional layer of wax, wait for the previous layer to dry completely. This will help prevent any stickiness or tackiness in the finish.
- Remove Excess Wax: If you notice any excess wax or drips, remove them immediately before they have a chance to dry. Use a cloth or brush to gently remove any excess wax that may have accumulated.
By following these application techniques, you will be able to achieve a beautiful and durable finish that will protect your furniture for years to come.
Apply the Wax
With the surface of your furniture cleaned, any damage repaired, and the right base coat applied, now it’s time to apply the wax. Waxing your furniture will not only give it a beautiful shine, but it will also add a protective layer that can extend its lifespan. However, before you start waxing, it’s important to choose the right wax for your specific furniture and to properly apply it to ensure a perfect finish.
Wax Selection
When it comes to selecting the appropriate wax for your furniture, there are several options available in the market. Each type of wax has its own unique properties and is suitable for different types of wood. It is essential to choose the one that is most appropriate for your furniture.
Here are some common types of wax along with their unique features and benefits:
| Type of Wax | Features and Benefits |
|---|---|
| Beeswax | 100% natural and non-toxic. Suitable for antique furniture and delicate wood finishes. Provides a natural appearance with a soft shine. |
| Carnauba Wax | Hard and durable, making it ideal for high-traffic areas such as floors and tabletops. Provides a long-lasting, high-gloss finish. |
| Microcrystalline Wax | A synthetic wax that is perfect for creating a protective layer on your furniture. It has a higher melting point than other waxes and is suitable for outdoor use. |
| Mineral Wax | A blend of natural and synthetic waxes that is suitable for all types of wood. It provides water and UV resistance and creates a matte finish. |
It is important to note that some waxes may contain harmful chemicals such as solvents, which can be harmful to your health and the environment. It is recommended to opt for natural waxes or those that are labeled as non-toxic.
Before selecting the wax, always test it on a small area first to ensure that it is compatible with your wood finish and produces the desired result.
Application Methods
When it comes to applying wax to your furniture, there are a few different methods you can try. Each method has its own unique benefits, so it’s important to choose the one that works best for you.
The Brush Method
Using a brush to apply wax is a popular choice because it allows for a more even application. To use this method, dip your brush in the wax and then brush it onto the furniture in long, even strokes. Make sure to work in small sections and avoid applying too much wax at once, as this can lead to an uneven finish.
The Cloth Method
Another option is to use a cloth to apply your wax. This method is best suited for smaller pieces of furniture or hard-to-reach areas. Simply dip your cloth into the wax and then rub it onto the furniture in circular motions. This method may require a bit more elbow grease than the brush method, but it can be a great choice for achieving a smooth, even finish.
The Spray Method
If you’re looking for a quick and easy way to apply wax, consider using a spray-on wax. This method allows you to evenly distribute the wax without the need for brushes or cloths. Simply spray the wax onto your furniture and then wipe it off with a clean cloth. This method is ideal for larger pieces of furniture or for those who are short on time.
The Pad Method
Lastly, you can also use a pad to apply wax to your furniture. This method is similar to using a cloth, but it allows for better control and precision. Simply dip your pad into the wax and then apply it to the furniture in a back-and-forth motion. This method is great for achieving a smooth, even finish on larger pieces of furniture.
No matter which method you choose, make sure to follow the manufacturer’s instructions and work in small sections to achieve the best possible results.
Cure the Wax
After applying the wax, it’s important to allow it to cure properly. This is the process of letting the wax dry and harden to create a protective layer over the furniture. Curing time will vary depending on the type of wax used, so it’s important to follow the manufacturer’s instructions. In general, the curing process can take several hours or up to a day, so it’s best to avoid touching or using the furniture during this time.
It’s also important to ensure proper ventilation during the curing process. This allows any fumes from the wax to dissipate and prevents them from building up in an enclosed space. If possible, open windows or use a fan to increase airflow in the room.
Additionally, it’s important to avoid exposing the furniture to any moisture during the curing process. This can prevent the wax from properly hardening and could lead to a streaky or uneven finish. Avoid placing items on top of the furniture or using it for any purpose during the curing process.
Once the wax has fully cured, it will create a protective layer over the furniture that can help preserve the finish and protect against moisture, dust, and other types of damage. Taking the time to properly cure the wax is essential to achieving a beautiful and long-lasting finish on your furniture.
Buff the Surface
After taking the time to carefully apply wax to your furniture, the final step to achieving that beautiful, polished finish is buffing the surface. Buffing removes any excess wax and creates a smooth, gleaming appearance that will make your furniture look brand new. However, it’s important to use the right materials and techniques to avoid causing damage. In this section, we’ll discuss the proper way to buff your furniture and maintain its shine.
Choosing the Right Cloth
When it comes to choosing the right cloth for buffing furniture wax, there are a few things to keep in mind. Firstly, the material of the cloth can make a big difference in the final result. Secondly, you want to avoid any lint or fibers being left on the surface. Finally, the size and shape of the cloth can also affect the ease and effectiveness of the buffing process.
Material
The material of the cloth should be soft and non-abrasive, such as microfiber or cotton. Avoid using any rough or scratchy materials that could damage the surface of your furniture. Additionally, consider using a cloth made specifically for waxing to ensure the best results.
Lint and Fiber Avoidance
Lint and fibers can be a common problem when buffing wax onto furniture, as they can be difficult to remove and can ruin the final look. Avoid using any cloths that shed fibers easily, and consider washing and drying your cloths before use to remove any loose fibers or lint.
Size and Shape
The size and shape of the cloth can play a role in the ease and effectiveness of the buffing process. A larger cloth can cover more surface area and may be more efficient in getting the job done quickly. However, a smaller cloth may be easier to maneuver around tight spaces and corners. Ultimately, the choice depends on your personal preference and the specific piece of furniture you’re working on.
To summarize, choosing the right cloth for buffing wax onto furniture requires considering the material, avoiding lint and fibers, and selecting the appropriate size and shape for the job. By keeping these factors in mind, you can achieve a beautiful, long-lasting wax finish on your furniture.
| Considerations | Options |
|---|---|
| Material | Soft, non-abrasive materials like microfiber or cotton |
| Lint and Fiber Avoidance | Avoid fibers that shed easily; wash and dry cloths before use to remove any loose fibers or lint |
| Size and Shape | Larger cloths for efficiency; smaller cloths for maneuverability around tight spaces and corners |
Buffing Techniques
After you have applied the wax and cured it, the next step is buffing. Buffing is essential to get a smooth and lustrous finish. Here are some buffing techniques you can use:
- Start with a soft cloth: The cloth you use for buffing should be soft and clean. Avoid using any abrasive material as it can damage the waxed surface.
- Apply a small amount of pressure: Use your hand to apply gentle pressure on the cloth while buffing. Do not press too hard, as it can leave swirl marks on the surface.
- Use circular motions: Circular motions are the most effective way to buff the surface. Start from the center and move outwards in a circular motion.
- Change the cloth: Once the cloth becomes dirty or saturated with wax, change it to a clean one. Using a dirty cloth can cause scratches on the surface.
- Be patient: Buffing requires patience and a steady hand. Take your time and buff the surface until you achieve a smooth and glossy finish.
Using these buffing techniques, you can maintain the finish of your furniture and make it look brand new. Remember to regularly dust and clean the furniture to prevent dirt buildup and periodic waxing to maintain the shine.
Maintaining Your Finish
Congratulations, you’ve successfully waxed your furniture and achieved a beautiful, shiny finish! However, the work doesn’t end there. It is important to maintain your finish to ensure its longevity and to keep your furniture looking its best. In this section, we will discuss the essential steps for maintaining your waxed furniture, including regular dusting and cleaning, as well as periodic waxing. Let’s dive in and learn how to keep your furniture looking its best for years to come.
Regular Dusting and Cleaning
Keeping your waxed furniture clean is essential to maintaining its quality and longevity. Regular dusting and cleaning will help prevent dirt, dust, and grime from building up on the surface of your furniture. Here are some tips to help you keep your waxed furniture looking great:
| Tip | Description |
|---|---|
| Dust regularly | Use a soft, dry cloth or a feather duster to gently remove dust from the surface of your furniture. Be sure to get into any crevices or carved areas where dust may accumulate. |
| Use a cleaner sparingly | If you need to use a cleaner to remove sticky or greasy residue, be sure to choose one that is safe for use on waxed furniture. Use it sparingly, and always follow the manufacturer’s instructions. |
| Avoid water | Water can damage waxed furniture, so it’s important to avoid using it for cleaning purposes. If you need to remove a stain or spill, try using a dry cloth or a mild cleaner specifically designed for use on wood surfaces. |
| Avoid direct sunlight and moisture | Direct sunlight and exposure to moisture can cause wood to warp, crack or fade. To protect your waxed furniture, avoid placing it in areas where it will be exposed to direct sunlight or moisture. |
| Wax periodically | Periodically applying a new coat of wax to your furniture will help protect it from everyday wear and tear. Be sure to follow the manufacturer’s instructions when applying a new coat of wax to your furniture. |
By following these simple tips, you can keep your waxed furniture looking great for years to come. Regular maintenance is key to ensuring that your furniture stays in top condition and continues to provide you with a beautiful and functional addition to your home.
Periodic Waxing
Maintaining your waxed furniture is essential to ensure that it continues to look stunning for years to come. One of the most critical factors in maintaining the surface’s sheen and appearance is by periodically waxing it. By adding a fresh coat of wax, you can enhance the protective layer on your furniture, retain its original tone, and keep it resistant to damage by the elements.
How often should you wax your furniture?
The frequency of waxing your furniture is dependent on several factors such as the amount of usage and the environment in which it is kept. In general, waxing your furniture every 6-12 months is a good starting point. However, if your furniture receives heavy use or is exposed to direct sunlight, heat, or humidity, you may need to apply wax more frequently.
How to wax your furniture periodically?
The process of waxing your furniture periodically is similar to the initial application, but it is quicker and more straightforward. Follow these steps to wax your furniture periodically:
| Step | Action |
|---|---|
| Step 1 | Clean the furniture with a soft cloth to remove any dust and dirt |
| Step 2 | Apply a small amount of wax to a clean cloth and rub it onto the furniture |
| Step 3 | Apply additional coats of wax to create a protective layer. Allow drying completely between coats |
| Step 4 | Buff the surface with a clean, soft cloth to achieve a glossy shine |
By frequently waxing your furniture and performing regular cleaning, your cherished pieces will look fantastic and last for many years to come. Keep in mind that it is critical to select the right wax for your furniture and follow the right application techniques to achieve the best finish possible.
Conclusion
In conclusion, preparing your furniture for waxing is an important step in maintaining its beauty and prolonging its lifespan. It involves a series of steps, including cleaning the surface, repairing any damage, choosing the right wax, applying a base coat, and finally, curing and buffing the surface.
By following the steps outlined in this article, you can achieve a professional-quality finish that will not only enhance the appearance of your furniture but also protect it from future wear and tear.
Remember to always choose the right wax for your specific type of furniture and to thoroughly clean and repair any damage before applying the wax. In addition, be sure to use the appropriate cloth and techniques when buffing the waxed surface.
Finally, it’s important to maintain your finished furniture by regularly dusting and cleaning it, and periodically reapplying wax as needed. With these simple yet effective steps, your furniture will continue to shine for years to come.
Frequently Asked Questions
Can I wax furniture without cleaning it first?
No, you need to clean the surface thoroughly before waxing to ensure the best finish.
What kind of damage can I repair before waxing?
You can fill medium-sized holes and cracks or sand down rough patches before waxing.
Can I use any wax on any type of furniture?
No, you need to choose a wax that is suitable for the specific type and finish of your furniture.
What is the purpose of applying a base coat before waxing?
A base coat will help the wax adhere to the surface more effectively and provide a smoother finish.
Can I apply wax with a brush?
Yes, you can use a brush to apply wax, but it’s recommended to use a cloth or sponge for a more even application.
Do I need to cure the wax after applying it?
Yes, you should let the wax cure for at least 24 hours before buffing the surface.
What kind of cloth should I use for buffing?
Use a soft, lint-free cloth such as microfiber or cheesecloth for buffing the surface.
Is it necessary to regularly maintain the waxed finish?
Yes, periodic waxing and regular dusting and cleaning will help maintain the finish and extend its lifespan.
Can waxing furniture protect it from scratches?
Yes, waxing furniture can help protect it from minor scratches and other types of wear and tear.
Can I use furniture polish instead of wax?
No, furniture polish is not a suitable alternative for wax as it’s designed for cleaning and shining without providing a protective coating.