When it comes to furniture maintenance, many people overlook the importance of waxing. However, waxing is a crucial part of keeping your furniture protected and looking its best. If you’re not sure where to start with DIY furniture waxing, fear not! There are different types of wax to choose from, and with proper preparation and techniques, anyone can do it. In this article, we’ll go over why waxing is important, the different types of wax, how to prepare your furniture, a DIY furniture wax recipe, techniques for application and maintenance, and common mistakes to avoid. So let’s dive in and learn how to make your furniture shine!
Why Waxing is Important

Applying wax to furniture may seem like an extra step in the maintenance process, but it actually serves an important purpose. The use of furniture wax can provide various benefits, including protection and improved appearance. By waxing your furniture, you can avoid potential damage while extending the life of the piece. In this article, we will explore the reasons why waxing is important in greater detail and provide tips to help you get started. So, whether you are a beginner or an experienced DIY enthusiast, this guide will have something for you.
Protects your furniture
Waxing your furniture not only gives it a beautiful shine, but it also provides a protective layer that helps prolong its lifespan. Waxing creates a barrier between the furniture’s surface and any moisture, dust, or dirt that may come in contact with it. This is especially important if you have wooden furniture that is prone to damage from exposure to water or other liquids.
Over time, furniture can become scratched or worn down from regular use. Applying wax helps to fill in these scratches and restore the furniture’s natural sheen. It also helps to prevent further scratches or damage from occurring, which can be costly to repair. By using the right type of wax and following the correct application techniques, you can ensure your furniture stays looking beautiful and stays protected for years to come.
If you want to learn more about the benefits of waxing your furniture, you can check out our article on wax furniture benefits. To make sure your furniture is properly prepared before waxing, our article on preparing furniture for waxing is a great resource. And if you’re curious about the different types of household wax available, you can read our article on types of household wax.
Enhances the appearance
Waxing your furniture not only protects it but also enhances its appearance, granting a glossy or matte finish depending on the wax type you choose. The process of waxing creates a warm glow and depth on wooden surfaces, which can give a timeless and enchanting look to furniture. Additionally, it helps to cover imperfections, scuffs, and scratches on the surface. By enhancing the visual appeal and charm of the wood grain, waxing brings out the natural beauty of your furniture pieces and revitalizes their overall look and feel.
Different wax types offer unique finishes to your furniture. Beeswax, for instance, gives a soft, buttery finish that keeps wood looking natural. On the other hand, Carnauba wax, which is more durable, provides a high gloss finish. Colored waxes can create a rustic, vintage look, and chalk paint wax is perfect for a matte and distressed final appearance. Choosing the right type of wax can help enhance the vintage, modern, rustic, or classical look of your furniture pieces.
However, it is important to keep in mind that waxing is different from polishing, which serves a different purpose of restoring shine and removing scratches. Waxing protects while polishing restores shine. Understanding the difference between waxing and polishing is important in order to achieve the best results for your furniture’s appearance and longevity. For more information on the differences between waxing and polishing, see this article.
Selecting the right type of wax and application technique is crucial. To learn about the best application techniques for waxing, check out this guide. However, even the best technique can be ruined by common mistakes, such as using too much wax, not buffing enough, or using improper tools. To avoid these mistakes and ensure the longevity of your waxed furniture, read this article.
Maintaining your waxed furniture is important to preserve its appearance and protection. To learn about the recommended frequency of waxing and how to wax your furniture to maintain its shine, read this article. If you want to revive old or faded furniture, colored wax may be the solution. To learn more about colored wax and how it can restore the appearance of your furniture, read this article.
Types of Furniture Wax
When it comes to waxing your furniture, you have a variety of choices. Each type of wax provides different benefits, so it’s important to choose the right one for your needs. There are three main types of furniture wax: beeswax, carnauba wax, and chalk paint wax. Each of them has its own unique properties that can enhance the look and feel of your furniture. In the waxing beginner’s guide, we discussed the importance of choosing the right wax for your project, and now we will dive deeper into each type of furniture wax to help you make an informed decision.
Beeswax
Beeswax is a popular type of furniture wax that is often used by woodworkers and furniture restorers. This type of wax has been used for centuries, and it is valued for its natural properties and its ability to protect and enhance wood surfaces.
What is Beeswax?
Beeswax is a natural wax that is made by honeybees. It is produced by worker bees and used to build the honeycomb structure within hives. Beeswax is a complex mixture of several types of wax, fatty acids, and other natural compounds.
Benefits of Beeswax for Furniture
Beeswax is an excellent natural wax that provides several benefits for furniture, including:
– Protects against moisture: Beeswax creates a natural barrier that helps protect wood against moisture damage.
– Restores natural luster: Beeswax can restore the natural luster and shine of wood, bringing out the beauty of the grain.
– Provides a protective layer: Beeswax can provide a layer of protection against scratches, stains, and other types of damage to wood surfaces.
How to Use Beeswax
To use beeswax on furniture, you will need to prepare the surface by cleaning and sanding it first. Once the surface is clean and dry, you can apply the wax using a soft cloth or brush, making sure to apply an even layer across the surface. After the wax has dried, you can buff the surface using a clean, dry cloth to bring out the shine and protect the wood.
Where to Buy Beeswax
Beeswax can be found at most craft stores, hardware stores, or online retailers. You can buy it in its natural form or in a pre-mixed wax that contains additional ingredients for extra protection or scent.
Conclusion
Beeswax is an excellent choice for those who want a natural and effective way to protect and enhance their furniture. With its natural barrier against moisture and ability to restore the natural luster of wood, it’s no wonder that beeswax has been a popular furniture wax for centuries.
Carnauba wax
Carnauba wax is a type of natural wax that is extracted from the leaves of the Brazilian palm tree, also known as Copernicia prunifera. It is a hard wax that is known for its durability and water resistance. Here are some key benefits and uses of Carnauba wax:
- Protective properties: Carnauba wax is known for its excellent protective properties, which makes it a popular choice for furniture waxing. It forms a protective barrier on the surface of the wood, which helps to prevent scratches, stains, and other damages caused by everyday wear and tear.
- Enhances shine: In addition to its protective properties, Carnauba wax can also help to enhance the shine and luster of your furniture. It leaves a glossy finish that looks great on any type of wood.
- Resistance to humidity: Carnauba wax is also known for its resistance to humidity, which makes it ideal for use in humid environments. It does not become sticky or tacky in high humidity, unlike some other types of wax.
When using Carnauba wax for furniture waxing, it is important to note that it is a hard wax and can be difficult to apply if it is not properly heated. You can either melt it using a double boiler or use it in combination with a softer wax to make it more pliable. In general, Carnauba wax is best used in combination with other types of wax to create a balanced and effective furniture wax.
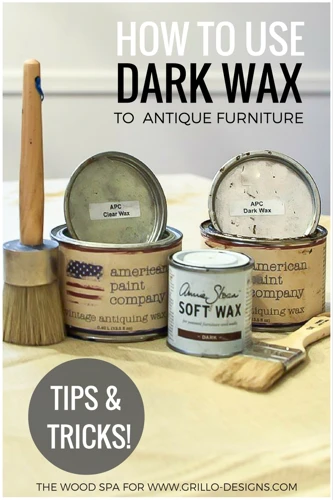
Chalk paint wax
Chalk paint wax is a popular choice when it comes to furniture waxing. Made specifically to be used with chalk paint, it provides a protective and matte finish to your furniture.
What is Chalk Paint Wax?
Chalk paint wax is made with a blend of natural waxes, such as beeswax and carnauba wax, as well as mineral spirits. It is designed to be used with chalk paint to enhance and protect the finish.
Benefits of Chalk Paint Wax
Chalk paint wax provides a number of benefits when used on furniture. It adds a layer of protection to the paint, preventing it from chipping, scratching or getting damaged. The wax also enhances the color and texture of the chalk paint, giving it a unique and beautiful finish.
How to Apply Chalk Paint Wax
When applying chalk paint wax, it’s important to use a clean and dry cloth or brush. You can apply the wax in a circular or back-and-forth motion, making sure to cover every area of the furniture piece. Allow the wax to dry for a few minutes, and then use a clean, dry cloth to buff the surface, creating a smooth, matte finish.
When to Use Chalk Paint Wax
Chalk paint wax can be used on any type of furniture that has been painted with chalk paint. It’s particularly useful for pieces that are regularly used and exposed to wear and tear, such as dining tables, chairs, and cabinets.
How to Choose the Right Chalk Paint Wax
There are a variety of chalk paint waxes available in the market, each with its own unique properties. Make sure to choose the wax that is appropriate for your furniture’s finish and intended use. Some waxes may be more durable or provide a shinier finish, so research before you buy.
| Pros | Cons |
|---|---|
| Protects furniture from damage | May require reapplication over time |
| Enhances the color and texture of chalk paint | Can be difficult to apply evenly |
| Gives a smooth, matte finish | May alter the color of the chalk paint |
| Affordable option for furniture waxing | Not suitable for all types of furniture |
Preparation
Before you start waxing your furniture, it is important to take the time to prepare it properly. This will ensure that your furniture looks its best and that the wax adheres properly. Preparation involves a two-step process: cleaning and sanding. By following these steps, you will be able to create a smooth surface that will allow the wax to be applied evenly. In this section, we will discuss the steps you need to take to adequately prepare your furniture for waxing.
Clean your furniture
Cleaning your furniture thoroughly before beginning the waxing process is essential for achieving a smooth and even finish. Follow these simple steps to ensure that your furniture is properly cleaned:
- Remove all dust and debris: Start by wiping down your furniture with a microfiber cloth to remove any dust or debris that may be sitting on the surface. You can also use a soft-bristled brush to ensure that all debris is removed.
- Use a cleaning solution: Once you’ve removed all the dust and debris, it’s important to use a cleaning solution to effectively remove any remaining grime or dirt. Choose a cleaning solution that is safe for your specific type of furniture, taking into consideration any manufacturer recommendations. Dilute the cleaning solution according to the manufacturer’s instructions and apply it to your furniture with a soft cloth.
- Rinse your furniture: After you’ve applied the cleaning solution, rinse your furniture thoroughly with clean water to remove any remnants of the cleaning solution.
- Dry your furniture: Finally, dry your furniture using a clean and dry microfiber cloth, ensuring that all excess moisture is removed. You can also leave it to air dry for a short period.
By cleaning your furniture thoroughly before waxing, you can ensure that the wax adheres properly to the surface, resulting in a beautiful and long-lasting finish.
Sand your furniture
Preparing your furniture before waxing is an essential step in achieving a professional-looking finish. One of the most important steps in preparing your furniture is sanding. Here are the steps you need to follow to sand your furniture effectively:
Step 1: Choose the right sandpaper grit – The grit of the sandpaper you use will depend on the condition of your furniture. If your furniture has a rough or uneven surface, start with a coarse grit sandpaper (60 to 100 grit). If the surface is smooth, use a finer grit sandpaper (120 to 220 grit).
Step 2: Clean the surface – Before you start sanding, make sure to clean the surface thoroughly. Use a dry cloth or a vacuum cleaner to remove any dust or debris from the surface.
Step 3: Sand the surface – Sand the surface of your furniture in the direction of the grain. Work systematically and always keep the sandpaper flat. Avoid putting too much pressure on the sandpaper, as this can damage the surface of your furniture.
Step 4: Check the surface – After sanding a section of your furniture, wipe the surface with a damp cloth to remove any dust. Check to see if the surface is even and smooth. Repeat the sanding process until the entire surface is sanded evenly.
Step 5: Remove dust – After sanding, make sure to remove all dust from the surface of your furniture. This can be done with a dry cloth or vacuum cleaner.
Sanding your furniture may seem like an extra step, but it is crucial to achieve the best results when waxing. A well-sanded surface will allow the wax to adhere better and provide a smoother finish. So don’t skip this step!
DIY Furniture Wax Recipe
Are you tired of using expensive furniture wax products that contain harsh chemicals? Luckily, you can make your own DIY furniture wax using natural ingredients. With just a few simple steps, you’ll have a high-quality wax that not only enhances the beauty of your furniture but also protects it from wear and tear. In this section, we’ll provide you with some easy-to-follow instructions and a simple recipe so that you can make your very own furniture wax right at home.
Ingredients
When it comes to making your own furniture wax, you don’t need many ingredients. In fact, you probably already have most of them on hand. Here is a list of the ingredients you’ll need:
| Ingredient | Amount |
| Beeswax | 1 cup |
| Carnauba wax | 1/2 cup |
| Jojoba oil | 1/2 cup |
| Citrus essential oil | 10-20 drops |
Beeswax: This is the main ingredient for making furniture wax. It protects the wood by creating a barrier that repels moisture and dust, and gives furniture a beautiful shine.
Carnauba wax: This wax provides a hard, protective coating and gives furniture a high gloss finish.
Jojoba oil: This oil is used as a lubricant to help spread the wax evenly, as well as to moisturize and protect the wood.
Citrus essential oil: This oil is optional, but it adds a pleasant scent to your furniture wax and can help neutralize odors.
All of these ingredients can be found at your local craft store or online. It’s important to use high-quality ingredients to ensure the best results for your DIY furniture wax.
Step by step instructions
To make your own homemade furniture wax, follow these simple steps:
| Step 1: | Melt 1 cup of beeswax using a double boiler or microwave. Be careful not to burn the wax. |
| Step 2: | Mix in 4 cups of mineral spirits into the melted beeswax. Stir gently until the mixture is smooth. |
| Step 3: | Add 1 cup of boiled linseed oil to the mixture. Stir well to ensure all ingredients are combined. |
| Step 4: | Allow the mixture to cool and thicken. This may take several hours, so be patient. |
| Step 5: | Once the mixture is cooled and thickened, apply it to your furniture with a clean cloth or a wax brush. |
| Step 6: | Use a wax buffing pad or another clean cloth to buff the wax until it shines. |
It is important to note that this DIY furniture wax recipe is just one of many variations available online. Some people may choose to use different ingredients or adjust the ratios to fit their specific needs. It is also important to use caution when working with hot wax and chemicals, and to follow all safety guidelines. With these steps and precautions in mind, making your own furniture wax can be a simple and rewarding DIY project.
Waxing Techniques
Now that you have prepared your furniture and made your own wax, it’s time to learn about the techniques for applying and buffing the wax. A proper application will ensure your furniture is protected and has a beautiful finish. It’s important to understand the steps and tools involved to achieve the best results. Let’s dive into the techniques for applying and maintaining your DIY furniture wax.
How to apply wax
To apply wax to your furniture, follow these simple steps:
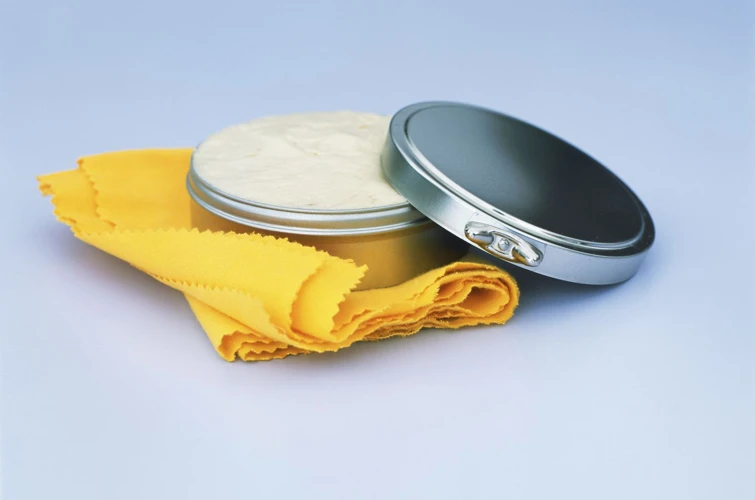
Step 1: Scoop a small amount of wax onto a clean, soft cloth. It’s better to start with a small amount and apply more as needed.
Step 2: Rub the wax onto the surface of your furniture using circular motions. Make sure to cover the entire surface evenly.
Step 3: Work in sections if you’re waxing a large piece of furniture. This will help you ensure that the wax is applied uniformly.
Step 4: Allow the wax to dry for at least 5-10 minutes, or until it becomes hazy.
Step 5: Buff the surface with a clean, soft cloth or brush. Use firm pressure and consistent circular motions to remove any excess wax and bring out a shine.
Step 6: Repeat this process until the entire piece is coated in wax. Allow the wax to cure for at least 24 hours before using the furniture.
By following these simple instructions, you’ll have a beautifully waxed piece of furniture that will be protected and look stunning for years to come.
How to buff wax
Buffing wax is an essential step in the waxing process that gives your furniture its final shine. Here are the steps to follow:
- Choose the right cloth for buffing: Choose a soft, lint-free cloth for buffing wax. A microfiber cloth or an old t-shirt works well for this purpose. Avoid using abrasive materials like steel wool, as it can damage the wax and leave scratches on the surface.
- Apply pressure while buffing: Apply a moderate amount of pressure while buffing to create heat that will help the wax penetrate into the pores of the wood. Be careful not to apply too much pressure, as it can lead to streaks and dull spots.
- Buff in circular motions: Buff in a circular motion, moving the cloth in the direction of the grain. This helps to distribute the wax evenly on the surface and creates a smooth, shiny finish.
- Buff in sections: Buff one section at a time and move onto the next. This prevents the wax from drying out and becoming difficult to buff.
- Check for streaks: After buffing, inspect the surface for any streaks or dull spots. If you notice any, apply a small amount of wax to the affected area and buff again using the same technique.
- Repeat the process: Repeat the buffing process until you achieve the desired shine. You can apply multiple layers of wax for a deeper shine, but make sure to buff each layer properly before applying the next one.
Remember, buffing is the final step in the waxing process, and it’s crucial for achieving a beautiful, long-lasting finish. Make sure to follow these steps carefully, and you’ll have a piece of furniture that looks better than ever before!
How to maintain your waxed furniture
Once you have waxed your furniture, it is important to maintain it properly to ensure that it lasts for a long time. Here are some tips on how to maintain your waxed furniture:
| TIP | DESCRIPTION |
|---|---|
| 1 | Avoid water and heat Waxed furniture should not be exposed to water or heat. Avoid placing hot items or cups directly on the surface of the furniture. Use coasters and place mats to protect your furniture from heat and moisture. |
| 2 | Dust regularly Dust your furniture regularly using a soft, lint-free cloth. This will help to keep your furniture clean and prevent dust buildup, which can dull the wax finish over time. |
| 3 | Re-wax as needed If you notice that the wax finish on your furniture is starting to look dull or faded, it may be time to re-wax it. Refer to the waxing techniques section above for instructions on how to reapply wax to your furniture. |
| 4 | Avoid harsh cleaning products Avoid using harsh or abrasive cleaning products on your waxed furniture, as they can damage the wax finish. Instead, use mild soap and water or a gentle wood cleaner to clean your furniture. |
| 5 | Avoid direct sunlight Avoid placing your furniture in direct sunlight, as it can cause the wax finish to fade over time. If your furniture is in a bright room, consider using curtains or shades to protect it from the sun’s rays. |
Following these simple tips will help to keep your waxed furniture looking beautiful for years to come. Regular maintenance will ensure that your furniture remains protected, and enhances the natural beauty of the wood.
Common Mistakes to Avoid
As you start your DIY furniture waxing journey, it is crucial to be aware of the common mistakes that can ruin all your hard work. It’s important to understand that furniture waxing is a delicate process that requires some skill and attention to detail. In this segment, we’ll highlight some of the common mistakes to avoid, so you can achieve the best results possible. By paying attention to these tips, you can ensure that you get the most out of your furniture waxing project and avoid any costly mistakes.
Using too much wax
When it comes to waxing your furniture, it’s important to remember that less is more. Applying too much wax can lead to a buildup on the surface, which not only looks unattractive but can also attract dust and dirt. Here are some tips to avoid using too much wax:
- Use a small amount: Start with a small amount of wax and apply it in a thin, even layer. You can always add more if needed, but it’s much harder to remove excess wax once it’s applied.
- Work in sections: Instead of applying wax to the entire piece of furniture at once, work in small sections. This will help you control the amount of wax you’re using and ensure that you’re applying it evenly.
- Buff as you go: Don’t wait until you’ve applied wax to the entire piece of furniture to start buffing. Buff each section as you go to ensure that you’re not leaving behind any excess wax.
Remember, using too much wax not only looks unappealing, but it can also affect the overall durability and lifespan of your furniture. So take your time, work in small sections, and use a small amount of wax to achieve a beautiful, long-lasting finish.
Using improper tools
When it comes to furniture waxing, using the right tools is just as important as using the right wax. Using improper tools can not only create an uneven finish, but it can also damage your furniture. Here are some common mistakes to avoid:
1. Using rough or abrasive cloths: When buffing wax, it’s important to use a soft cloth to avoid scratching the surface of your furniture. Avoid using old t-shirts or towels as they may contain rough fibers that can damage the surface.
2. Using synthetic brushes: When applying wax, it’s important to use a natural bristle brush as synthetic brushes can leave streaks and not provide an even application. Natural bristle brushes are gentle on the furniture and help evenly distribute the wax.
3. Using paper towels: Using paper towels to apply or buff wax can create small scratches on the furniture surface. Instead, use a soft, lint-free cloth such as a microfiber towel.
4. Using too much pressure: While it may be tempting to apply pressure when buffing wax, it’s important to use a light touch to avoid damaging the wax finish or the furniture surface.
5. Using a dirty cloth: Using a dirty cloth to buff wax can result in streaks and an uneven finish. Always make sure to use a clean cloth when applying and buffing wax.
By using the proper tools and techniques, you can achieve a beautiful wax finish on your furniture while avoiding potential damage.
Not buffing enough
One common mistake when it comes to DIY furniture waxing is not buffing the wax enough. Buffing is the process of polishing the waxed surface to create a smooth and shiny finish. When you don’t buff enough, the wax can leave a dull and hazy appearance on your furniture. To avoid this mistake, consider the following tips:
- Use a microfiber cloth: One of the best ways to buff wax is to use a microfiber cloth. These cloths are soft and gentle, so they won’t scratch your furniture, and they pick up any excess wax as you buff.
- Buff in circular motions: When buffing wax, it’s best to use circular motions to ensure that you cover all areas evenly. Apply a small amount of pressure, and keep buffing until the wax has been evenly distributed and has a smooth and shiny finish.
- Don’t rush the process: Buffing wax can take time, but it’s important not to rush the process. Take your time, and make sure you buff all areas of the furniture to ensure an even, consistent finish.
- Check your work: After you’ve finished buffing, make sure to check your work. Look at the furniture from different angles to make sure that you’ve covered all areas evenly, and check for any spots that might need additional buffing.
Remember, proper buffing is important to achieve a professional-looking finish for your furniture. Take the time to do it right and your efforts will pay off in a beautiful and long-lasting waxed finish.
Conclusion
As we come to the end of this article, it’s time to reflect on the knowledge we’ve gained about DIY furniture waxing. Throughout the process, we’ve explored the various types of wax available, the necessary preparations, and the techniques needed for a successful finish. Now, let’s take a moment to summarize our findings and consider the benefits of taking the DIY route when it comes to furniture waxing.
Final thoughts
DIY furniture waxing is a great way to protect and enhance the appearance of your furniture. By using natural ingredients, you can avoid harsh chemicals that can damage your furniture over time.
Here are some key takeaways:
- Furniture waxing is important because it protects your furniture from wear and tear and enhances its appearance.
- There are different types of furniture wax to choose from, including beeswax, carnauba wax, and chalk paint wax.
- Preparing your furniture by cleaning and sanding it is important to ensure a smooth surface for waxing.
- You can make your DIY furniture wax using natural ingredients like beeswax, coconut oil, and essential oils.
- When waxing your furniture, apply it in thin layers and buff it with a soft cloth for a smooth finish.
- Avoid common mistakes like using too much wax, using improper tools, and not buffing enough.
- DIY furniture waxing has several benefits, including saving money and the satisfaction of doing it yourself.
Incorporating DIY furniture waxing into your home maintenance routine is a simple and effective way to keep your furniture looking its best for years to come.
Benefits of DIY Furniture Waxing
When it comes to furniture care and maintenance, DIY furniture waxing can offer several benefits. Let’s take a closer look at some of the advantages of this process:
| Benefits of DIY Furniture Waxing |
|---|
|
DIY furniture waxing is a versatile, cost-effective, and eco-friendly way to protect and enhance your furniture’s appearance while avoiding harsh chemicals. With proper preparation, application, and maintenance, you can enjoy the long-lasting benefits of a beautiful and well-protected furniture finish.
Frequently Asked Questions
What is furniture wax?
Furniture wax is a protective coating applied to wooden furniture to give it a smooth, polished finish and to protect it from scratches and other types of damage.
How does furniture wax differ from furniture polish?
Furniture wax and furniture polish are both used to protect and enhance wooden furniture, but wax is a thicker and more durable product that lasts longer and provides greater protection.
Is furniture wax suitable for all types of wooden furniture?
Furniture wax is suitable for most types of wooden furniture, including antique, vintage or modern pieces. However, it is not recommended for unfinished or unsealed wood.
Can I make my own furniture wax?
Yes, you can make your own furniture wax using natural ingredients such as beeswax and essential oils. This allows you to avoid using chemical-based products and can be a more cost-effective solution.
How often should I wax my furniture?
The frequency of waxing your furniture will depend on how frequently the furniture is used and how much wear and tear it is exposed to. A general recommendation is to wax it at least once every six months.
Do I need to sand my furniture before applying wax?
Yes, it is recommended to sand your furniture lightly before applying wax. This helps to remove any dirt, grime, or previous wax buildup and creates a smooth surface for the new wax to adhere to.
Can I apply furniture wax on painted furniture?
Yes, you can apply furniture wax on painted furniture, but it is important to choose a wax that is compatible with the type of paint you have used. Chalk paint wax is a popular option for this type of project.
How do I apply furniture wax?
You can apply furniture wax using a clean, lint-free cloth or a wax brush. Start by applying a thin, even layer of wax in small sections and allow it to dry completely before buffing it with a clean cloth.
What is buffing in furniture waxing?
Buffing is the process of rubbing the dried wax on the furniture using a clean, soft cloth. This helps to remove any excess wax, create a smooth, polished finish, and enhances the shine and durability of the wax.
What are some common mistakes to avoid when waxing furniture?
Common mistakes to avoid when waxing furniture include using too much wax, using improper tools such as steel wool or sandpaper, and not buffing the wax enough to create a smooth finish.