Removing hair by waxing is a popular method for achieving smooth, hair-free skin. However, for beginners, the idea of waxing can be perplexing and overwhelming. The good news is that with the right tools, techniques, and aftercare, anyone can achieve a successful waxing experience. In this article, we will take you through step-by-step on the best application techniques for waxing, including preparation, types of wax, tools and products, techniques, and aftercare tips. By the end, you’ll feel confident and ready to wax like a pro.
Preparation
Before jumping into the waxing process, it’s important to properly prepare your skin to ensure the best possible results. This includes cleansing and exfoliating, as well as trimming any longer hairs. Taking these steps will help prevent unnecessary pain and ensure that the wax adheres properly to the hair, making it easier to remove. Proper preparation is key for a successful waxing experience, so let’s dive into the details.
Cleanse and Exfoliate
Before waxing, it is important to cleanse and exfoliate the skin to ensure that the wax can adhere properly and effectively remove the hair. Start by using a gentle exfoliating scrub or body wash to remove any dead skin cells, which can cause the wax to stick to the skin rather than the hair. This will also help prevent ingrown hairs.
After cleansing, dry the skin thoroughly and avoid applying any lotions or oils, as these can create a barrier between the wax and the hair. If you have any sensitive areas, such as the bikini area, consider taking a pain reliever 30 minutes before waxing to minimize discomfort.
It is also important to trim your hair to the optimal length before waxing. Hair that is too short may not adhere well to the wax, while hair that is too long can be more painful to remove. Aim for hair that is about a quarter inch long, or as instructed by your waxing professional.
For more tips on waxing preparation, check out our Beginner’s Guide to Waxing.
Trim Your Hair
When it comes to waxing, trimming your hair beforehand is an important step to ensure the wax can adhere properly. This is particularly important for longer hairs, which can make the waxing process painful or less effective if not trimmed. However, you don’t want to trim too short, as this can make it harder for the wax to grab onto the hair. So, how do you determine the right length to trim to?
Here are some tips for trimming your hair before waxing:
| 1. Check the waxing length recommended for the type of wax you are using. | Before you start trimming, check the instructions for the wax you will be using. Some waxes work best on longer hair, while others require shorter hair. Follow the recommended length for best results. |
| 2. Use scissors or clippers specifically designed for trimming body hair. | Regular household scissors or clippers may not be precise enough for the delicate skin on your body. Look for grooming tools specifically designed for trimming body hair, which will have safety features to prevent nicks or cuts. |
| 3. Trim to about ¼ inch (0.6 cm) for best results. | This is typically the ideal length for waxing. Trimming to this length makes it easier for the wax to grab onto the hair, while still leaving enough length for the hair to be grasped. |
| 4. Be cautious when trimming around sensitive areas. | Some areas, such as the bikini area or underarms, are more sensitive than others. Take extra care when trimming around these areas to avoid any painful nicks or cuts. |
By following these tips, you can ensure that your hair is trimmed to the proper length for a successful waxing session. Remember, proper preparation is key to avoiding common waxing mistakes and achieving the best possible results.
If you’re interested in learning more about waxing, be sure to check out our article on the common waxing mistakes to avoid, or read about the benefits of waxing furniture.
Types of Wax
When it comes to waxing, there are two main types of wax to consider: hard wax and soft wax. Both types have their own unique advantages and disadvantages, so it’s important to understand the differences before making a decision. Hard wax is a popular choice for smaller, sensitive areas, while soft wax is a more versatile option that can be used for larger areas. If you’re looking to wax furniture instead, be sure to check out our guide on types of household wax.
Hard Wax
Hard wax is a type of wax that is thicker and becomes solid when it cools down. It is ideal for use on smaller sections of the body such as the underarms, face, and bikini area. Hard wax is melted and then applied onto the skin without the use of cloth strips. This wax is suitable for individuals with sensitive skin as it minimizes discomfort during the hair removal process.
To apply hard wax, you will need a wax warmer, a spatula, and hard wax beans. Simply turn on the wax warmer and pour the wax beans into the pot. Once the wax has melted, use the spatula to apply a thick layer of wax onto the desired area. Wait for the wax to cool and harden, then gently peel it off in the opposite direction of hair growth.
One advantage of hard wax is that it can grab shorter hairs more effectively than soft wax, making it perfect for individuals who want to maintain a hair-free look for longer. Additionally, hard wax doesn’t stick to the skin like soft wax, so there is less chance of skin irritation or redness.
While waxing and polishing are often used interchangeably when it comes to furniture care, this type of hard wax is not recommended for use on furniture. Instead, furniture wax that is specifically formulated for use on wooden surfaces should be used. Check out our guide on preparing furniture for waxing to learn more about how to take care of your wooden furniture.
Soft Wax
Soft wax, also known as strip wax, is the most common type of wax used in salons and spas. It consists of a thin layer of wax applied to the skin and removed with cloth strips. Soft wax is ideal for larger areas of the body, such as legs, arms, and back.
Soft wax is effective on fine hair but may not be ideal for coarse hair. It is also more suitable for sensitive skin due to its low melting point, which reduces the risk of burns or irritation. The wax is typically heated in a wax warmer until it reaches a melting point of around 120°F.
| Pros | Cons |
|---|---|
| Can be applied thinly | Can be messy to apply |
| Less painful than hard wax | May require multiple applications in certain areas |
| Effective on fine hair | May not be ideal for coarse hair |
| Low melting point reduces risk of burns or irritation | Skin can become red or irritated after waxing |
Soft wax is an excellent choice for those who are new to waxing or have never waxed before. Its ease of use and effectiveness make it a popular choice among both beginners and professionals.
If you’re interested in DIY furniture waxing tips and tricks, you might want to check out our article on that topic.
Tools and Products
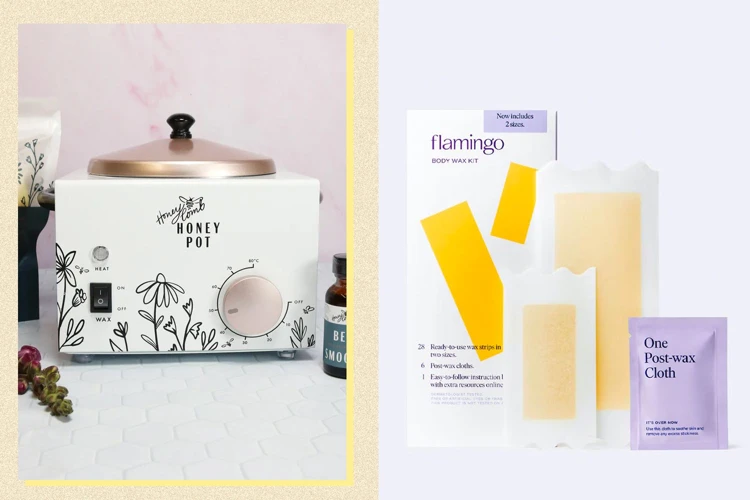
As a beginner, it’s essential to have the right tools and products for a successful and comfortable waxing experience. From a wax warmer to cloth strips, each item plays a crucial role in the process. Wax warmer is a must-have, as it ensures that the wax stays at a consistent temperature throughout the session. A spatula is also necessary for spreading the wax onto your skin. Cloth strips come in various sizes and materials, and it’s important to choose one that suits your needs. Lastly, a post-waxing oil provides relief to your skin after waxing. These tools and products will give you the best possible experience and help you achieve a smooth, hair-free result.
Wax Warmer
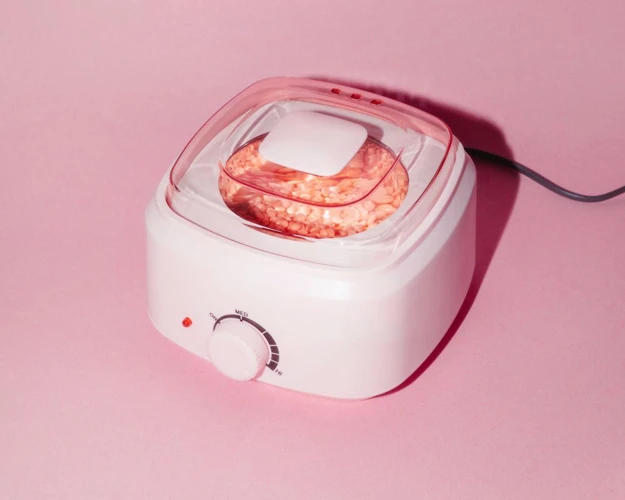
A wax warmer is an essential tool for heating wax to the correct temperature for use on the skin. When choosing a wax warmer, there are several factors to consider, including size, temperature control options, and heating time.
One option is a plug-in wax warmer, which is compact and easy to use. These warmers generally have a small capacity, heating enough wax for one or two uses at a time. They typically take around 15-20 minutes to heat the wax to the desired temperature.
Another option is a professional-grade wax warmer, which is larger and has a greater capacity. These warmers are often used in salons and spas, but can also be used at home. They typically have more advanced temperature control options, allowing for more precise temperature settings.
No matter which type of wax warmer you choose, it is important to follow the manufacturer’s instructions carefully to ensure safe and effective use. It is also important to regularly clean your wax warmer to prevent wax buildup and ensure longevity.
For those who use wax in furniture restoration, there exist special wax warmers. They differ from those mentioned above as they are used for a different purpose. To learn more about those warmers, click here. If you want to learn how to revive colored wax for furniture restoration purposes, check out our article on colored wax revival.
Spatula
One of the most important tools you’ll need for waxing is a spatula. This is the tool that you’ll use to apply your wax to your skin. It’s important to choose a spatula that is the right size for the area that you’re waxing. A smaller spatula will be easier to control when waxing smaller areas like your eyebrows or upper lip, while a larger spatula will be better for waxing larger areas like your legs or back.
When choosing a spatula, look for one that is made out of a sturdy material like wood or metal. Flexible plastic spatulas can make it harder to apply the wax evenly. It’s also a good idea to choose a spatula with a rounded edge. This will help you spread the wax more evenly without leaving any sharp lines.
Pro tip: If you’re new to waxing, it’s a good idea to practice with your spatula before applying the wax to your skin. This will help you get a feel for how much pressure to use when spreading the wax.
To use your spatula, scoop a small amount of wax onto the end of the spatula. Then, place the spatula against your skin and spread the wax in a thin, even layer. Be sure to spread the wax in the direction of hair growth to help minimize discomfort when removing the wax.
Remember: always use a clean spatula when applying wax to your skin. Using a dirty spatula can introduce bacteria to your skin, which can lead to breakouts and other skin irritations.
After you’ve finished waxing, be sure to clean your spatula thoroughly. Rinse the spatula under hot water and use a mild soap to remove any residual wax. Dry the spatula thoroughly before storing it away for your next waxing session.
Cloth Strips
When it comes to waxing, cloth strips are an essential tool for achieving a smooth and hair-free result. These strips come in a variety of materials, sizes, and textures. In this section, we’ll take a closer look at choosing the right cloth strips for your waxing needs.
Materials: Cloth strips can be made from different fabrics such as muslin, cotton, or polyester. Muslin strips are the most common type and are known for their durability and flexibility. Cotton strips are soft and gentle on the skin, making them ideal for sensitive areas. Polyester strips have a tighter weave and are better suited for coarse hair.
Sizes: Cloth strips come in different sizes, ranging from small strips for facial hair to larger strips for legs and arms. It’s important to choose a size that fits the area you’re waxing. Using a strip that is too small can result in uneven waxing and using a strip that is too large can make it difficult to apply and remove the wax.
Textures: Cloth strips also vary in texture. Some strips have a smooth surface, while others have a slightly rough texture that helps grip the wax better. Consider the texture of the strip based on the type of wax you are using. For example, if you are using hard wax, you may want to choose a strip with a rough texture to help it adhere to the wax better.
Here’s a summary of tips for choosing the right cloth strips:
| Materials | Sizes | Textures | |
|---|---|---|---|
| Tips | Choose based on skin sensitivity and hair type | Choose the right size for the area being waxed | Consider the texture based on the type of wax being used |
By taking these factors into consideration, you can select the appropriate cloth strips for your waxing needs, ensuring a successful and comfortable experience.
Post-Waxing Oil
After removing the wax, it’s important to soothe and hydrate your skin to avoid any irritation or discomfort. Post-waxing oil is an essential product to use after waxing as it helps to calm and moisturize your skin. Here are a few benefits of using post-waxing oil:
- Reduces discomfort: Post-waxing oil helps reduce discomfort and soothe the skin, especially if you have sensitive skin.
- Hydrates the skin: Waxing can strip away natural oils from your skin, making it dry and dehydrated. Applying post-waxing oil will help hydrate and moisturize your skin, leaving it soft and smooth.
- Prevents ingrown hairs: Using post-waxing oil helps prevent ingrown hairs by providing a barrier between the skin and the hair follicles.
When choosing a post-waxing oil, look for products that are specifically designed for sensitive skin and contain natural ingredients like aloe vera, chamomile, and lavender. Avoid using products that contain alcohol or fragrances, as they can irritate your skin.
To apply post-waxing oil, gently massage a small amount onto the waxed area until it’s fully absorbed. Do this after every waxing session to keep your skin hydrated and healthy.
Techniques
Now that you’ve gathered all the necessary tools and products, it’s time to move on to the application techniques. Although it may seem intimidating at first, with a little practice and patience, you can perform a successful waxing session right at home. In this section, we’ll cover step-by-step instructions on how to apply the wax properly to minimize pain and increase efficiency. So put on some relaxing music and let’s get started!
Section Your Skin
Before applying wax, it is important to properly section your skin to ensure an even and effective waxing experience. This can be achieved by dividing the area you want to wax into smaller and more manageable sections. Here’s a step-by-step guide on how to do it:
1. Clean the area: Before sectioning your skin, make sure to clean it thoroughly with warm water and mild soap. This will help remove any dirt, oil or sweat that may interfere with the waxing process.
2. Dry the area: Once you’ve cleaned the area, pat it dry with a clean towel or cloth. Make sure there is no moisture left on the skin as it can prevent the wax from adhering properly.
3. Mark the sections: Using a white eyeliner pencil or any other removable marker, mark the areas you want to wax. Start by dividing the area into halves, then quarters, and so on, until you have sections that are small and manageable.
4. Apply the wax: Take a small amount of wax and apply it to the first section of your skin using a spatula. Make sure the layer of wax is thin and even, and that it follows the direction of your hair growth.
5. Place the strip: Once the wax has been applied, place a cloth strip over it and press down firmly. Make sure the strip is long enough to cover the whole section and that it has enough wax to adhere to.
6. Repeat for other sections: Move on to the next section and repeat the same process until you’ve covered all areas you want to wax.
Properly sectioning your skin can make a big difference in the effectiveness and comfort of your waxing experience. It allows you to focus on one area at a time, ensuring that no hair is missed or over-treated.
Apply the Wax
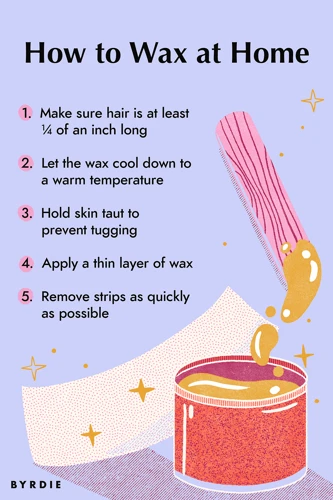
To apply the wax, follow these steps:
- Check the temperature: Ensure the wax is at a suitable temperature before you begin. If you are using a wax warmer, it should be set to the recommended temperature. If you are using hard wax, check that it has cooled down enough to apply comfortably to your skin without burning.
- Apply a thin layer of wax: Dip the spatula into the wax and scoop out a small amount. Apply a thin, even layer of wax in the direction of hair growth. Be cautious not to apply too much wax, as this can make it harder to remove and can cause more pain.
- Leave a tab: Once the wax has been applied, leave a small tab of wax at the end of the strip to make it easier to remove. This tab should be around 1-2 inches long and extend beyond the area of hair that you have waxed.
- Press down firmly: Use your fingers to press down firmly on the wax strip in the direction of hair growth. This will help to ensure the wax adheres to the hair and is easier to remove.
- Hold the skin taut: Use one hand to hold the skin taut around the waxed area. This will help to reduce pain and ensure the strip is removed in the correct direction.
- Remove the strip quickly: Using your other hand, quickly remove the strip in the opposite direction of hair growth. Do not pull the strip away from your skin, as this can cause bruising or damage. Instead, keep the strip as close to your skin as possible and pull it off in one swift movement.
- Repeat as needed: Repeat the process, applying wax to small sections of hair at a time, until you have removed all unwanted hair. Avoid going over an area more than twice, as this can cause irritation and pain.
By following these steps, you can help ensure that your waxing experience is as pain-free and effective as possible.
Remove the Wax
Once you have applied the wax to your skin, it is time to remove it. Here are the steps you need to follow:
| Step | Description |
|---|---|
| 1 | Hold the skin taut: Hold the skin immediately surrounding the waxed area taut with one hand. This helps to reduce pain and discomfort during the waxing process, and can also help to achieve a better waxing result. |
| 2 | Grasp the edge: Grasp the edge of the wax strip that is furthest away from the direction you want to remove it in. |
| 3 | Remove the wax: In one swift motion, pull the wax strip off in the opposite direction of hair growth. Be sure to pull the strip parallel to your skin, rather than away from it, as this will help to minimize discomfort. |
| 4 | Press down: Immediately after removing the strip, use your hand to press down firmly on the waxed area. This will help to soothe the skin and reduce any discomfort you may be feeling. |
| 5 | Repeat as necessary: Depending on the size of the area you are waxing, you may need to repeat these steps multiple times until all unwanted hair has been removed. |
Remember, it is normal to experience some temporary redness, irritation or soreness after waxing. Applying post-waxing oil and following aftercare tips can help to soothe and protect your skin.
Apply Post-Waxing Oil
After you have removed all the wax from your skin, it’s important to apply post-waxing oil to soothe and protect the area. This step is crucial for preventing irritation, redness and infection.
Here are the steps to apply post-waxing oil:
- Clean the area: Before applying the oil, make sure the area is free of any wax residue or debris. Use a clean towel or cloth to gently wipe away any wax that remains.
- Dispense the oil: Dispense a small amount of post-waxing oil onto your hand, and rub your hands together to warm the oil.
- Apply the oil: Using circular motions, gently massage the oil onto the waxed area. Make sure to cover the entire area with the oil, and avoid rubbing too hard.
- Let it absorb: Allow the oil to absorb fully into your skin for about 5 to 10 minutes. During this time, try to avoid wearing tight clothing or anything that may rub against the waxed area.
- Repeat as needed: You can reapply post-waxing oil as needed throughout the day to keep your skin moisturized and protected.
Remember, using post-waxing oil is an essential step in your waxing routine to prevent any unwanted side effects. Taking care of your skin after waxing will not only make the process more comfortable, but it will also help you achieve smoother, long-lasting results.
Aftercare Tips
Taking care of your skin after a waxing session is just as important as preparing for it. Waxing can leave your skin feeling sensitive and vulnerable, so it’s crucial to treat it with care. By following these essential aftercare tips, you can help soothe your skin, prevent irritation, and ensure long-lasting results. Let’s explore what you can do to keep your skin healthy and glowing after a wax.
Avoid Hot Baths and Showers
After waxing, it’s important to avoid hot baths and showers for at least 24-48 hours. This is because hot water can open up your pores, which may become clogged with bacteria and result in infections. Hot water can strip the skin of its natural oils, leading to dryness and irritation. Therefore, it’s best to stick to lukewarm showers and baths until your skin has fully healed.
While taking a shower, make sure to use mild soaps and avoid exfoliating or scrubbing the waxed area. This can cause further irritation and damage to the skin. Also, avoid using hot tubs, saunas or steam rooms as these can cause sweating which can lead to infections.
Additionally, avoid exposing the newly waxed skin to direct sunlight immediately after the procedure, as UV rays can cause sunburn and further damage the skin. It’s recommended to wear loose clothing, and if going outside, to use sunscreen to protect the skin.
Overall, it’s important to practice proper aftercare to maintain the health and appearance of your newly waxed skin. By avoiding hot baths and showers, and taking other precautions, you can ensure that your skin remains smooth, healthy and irritation-free.
Avoid Sun Exposure
After waxing, it’s important to protect your skin from the harmful UV rays of the sun. Avoiding sun exposure can help minimize the chance of skin damage and irritation. Here are some tips to follow:
- Stay indoors or seek shade during peak sun hours, typically between 10 am and 4 pm.
- Wear clothing that covers the waxed area or use a sunscreen with at least SPF 30.
- Reapply sunscreen every two hours or immediately after swimming or sweating.
Exposure to the sun can cause the skin to become more sensitive and prone to irritation. Additionally, the sun can cause hyperpigmentation or darkening of the skin. By avoiding sun exposure and wearing protective clothing or sunscreen, you can help ensure that your skin stays healthy and free from damage after waxing. Remember to follow these tips for at least 24-48 hours following your waxing session.
Exfoliate Gradually
Exfoliating your skin after waxing is a crucial step in the aftercare process. However, it is important to exfoliate gradually and delicately to avoid irritation or damage to the skin. Here are some tips for a safe and effective exfoliation process:
- Wait a few days before exfoliating: Give your skin some time to heal before starting to exfoliate. Wait at least 24-48 hours after waxing before using any exfoliating products.
- Choose the right exfoliator: Look for exfoliating products that are gentle and free of any irritants or harsh chemicals. Avoid products with microbeads or other abrasive particles that can scratch or damage the skin.
- Exfoliate gently: Use a soft-bristled brush or a gentle exfoliating scrub to massage the skin in circular motions. Be careful not to scrub too hard or apply too much pressure, as this can cause irritation or inflammation.
- Moisturize afterwards: After exfoliating, apply a moisturizer or aloe vera gel to help soothe and hydrate the skin. This can help prevent dryness or flakiness, which can lead to further irritation.
- Gradually increase frequency: Start by exfoliating once a week and gradually increase to 2-3 times a week if your skin can tolerate it. Listen to your skin and adjust the frequency as needed.
Remember, exfoliating is an important part of maintaining healthy and smooth skin after waxing, but it needs to be done gradually and gently for the best results. By following these tips, you can help prevent irritation and keep your skin looking its best.
Conclusion
After following the best application techniques for waxing as a beginner, you will certainly achieve smooth and hair-free skin. As discussed, preparation is key to achieving the best results. Properly cleansing, exfoliating, and trimming your hair will ensure that the wax can effectively adhere to your skin.
Additionally, understanding the different types of wax available and the tools and products necessary for the waxing process is crucial. Whether opting for hard wax or soft wax, a wax warmer, spatula, cloth strips, and post-waxing oil are all necessary components.
When it comes to application techniques, taking the time to section your skin and applying the wax properly will make for a more successful waxing experience. Removing the wax quickly and effectively is also important, as well as following up with post-waxing oil to soothe the skin.
Finally, aftercare tips should not be overlooked. Avoiding hot baths and showers, sun exposure, and gradually exfoliating can help maintain smooth skin and prevent irritation. By following these steps and tips, you can confidently achieve a professional-level waxing experience from the comfort of your own home.
Frequently Asked Questions
How long should my hair be for waxing?
Your hair should ideally be at least ¼ inches long, or about the size of a grain of rice.
Can I wax if I have sensitive skin?
Yes, but it’s important to choose a wax that is specifically formulated for sensitive skin and to do a patch test beforehand.
Is it safe to wax at home?
Yes, as long as you prepare properly, follow the instructions carefully, and take necessary precautions to avoid burns and injuries.
Can I wax if I’m pregnant?
It’s generally safe to wax if you’re pregnant, but it’s always a good idea to consult with your doctor beforehand.
How long does a waxing session usually take?
Waxing sessions can take anywhere from 30 minutes to 2 hours, depending on the size of the area being waxed.
How often should I wax?
It depends on your hair growth cycle and the area being waxed, but most people wax every 3-6 weeks.
How do I remove wax residue from my skin?
You can use oil-based substances like baby oil or coconut oil to remove wax residue from your skin.
Can I wax if I have sunburn?
No, you should wait until your sunburn has healed before waxing to avoid further irritation and potential skin damage.
Is it normal to experience redness and bumps after waxing?
Yes, it’s normal to experience some redness and bumps after waxing, but they should go away within a few hours to a few days.
Can I go swimming after waxing?
No, it’s best to wait at least 24 hours before swimming to avoid exposing your skin to potentially harmful bacteria in pools or bodies of water.