As we try to maintain cleanliness in our homes, one important aspect that should not be overlooked is our floors. Dirty floors not only ruin the aesthetic of our homes but also can cause health hazards. However, with the wide variety of floor polish available in the market, it can be difficult to choose one that is both effective and safe. But what if we told you that you can make your own natural floor polish with common household ingredients? In this article, we’ll guide you through the steps to make natural floor polish without harmful chemicals.
Why Natural Floor Polish?
As we strive towards a healthier and more sustainable lifestyle, it’s important to consider the products we use in our homes, including floor polish. While commercial floor polish may seem like the easy solution, it’s important to think about the potential harm it can cause to our health and environment. In this article, we explore the benefits of using natural floor polish. From being safe and chemical-free to cost-effective, natural floor polish is the way to go. So why not try making your own natural floor polish instead of resorting to store-bought options? Check out our DIY recipes below and also consider making your own beeswax polish, essential oil furniture polish, eco-friendly leather polish, or even a scented polish spray for stainless steel. It’s time to take a step towards a cleaner and safer home.
It’s Safe and Chemical-Free
Using natural floor polish is a safe and chemical-free way to clean your floors. Most commercial floor polishes contain harmful chemicals that can be dangerous to your health and the environment. Switching to natural floor polish helps eliminate these concerns. Here are some reasons why using natural floor polish is a safer choice:
- No harsh chemicals: Natural floor polishes are made from everyday household items like vinegar, olive oil, lemon juice, and baking soda. These ingredients are not only safe to use but also readily available in most households.
- No toxic fumes: Most synthetic floor polishes emit toxic fumes that can cause respiratory problems, especially for people with asthma or allergies. Using natural floor polish eliminates this risk of toxic fumes, making it a safe choice for everyone.
- Pet and child-friendly: If you have pets or young children, using natural floor polish is a great way to ensure their safety. Children and pets often spend a considerable amount of time on the floor, so using a natural floor polish eliminates the risk of them coming into contact with toxic chemicals.
- Safer for the environment: Most of the chemicals in commercial floor polish products are not biodegradable, which makes them harmful to the environment. By using natural floor polish, you are not only keeping your home safe but also ensuring that you are doing your part in protecting the environment.
Using natural floor polish is the safer and healthier option when it comes to cleaning your floors. The use of safe and natural ingredients will provide a clean and polished floor without the harmful effects of chemical-based floor polishes.
It’s Cost-Effective
When it comes to floor care, most homeowners resort to expensive floor polishes and cleaners without considering the environmental impact and the cost to their pockets. However, by using natural ingredients found in your own household, you can create your own cost-effective floor polish that is both safe and sustainable. Not only will it save you money, but it will also contribute to a healthier home environment.
Here are some reasons why natural floor polish is cost-effective:
- No need to buy expensive commercial products: By using simple household ingredients, you can make an effective floor polish without having to spend money on expensive polishes and cleaners.
- Long-lasting: Natural floor polish can last for months and sometimes even longer, depending on the frequency of use and the amount of foot traffic in the area. This means that you won’t have to keep buying new polishes and cleaners as often.
- Reduces floor maintenance costs: Over time, floors can become dull and lose their shine, which often leads to costly repairs or replacements. However, by using natural floor polish, you can maintain the shine and quality of your floors for a longer period, ultimately reducing maintenance costs.
- Environmentally-friendly: Natural floor polish reduces the environmental impact of commercial products. By avoiding harsh chemicals and detergents, you eliminate the need for disposal of hazardous materials. This, in turn, saves you money and helps to lessen the negative impact on the environment.
By creating your own natural floor polish, you not only save money, but you also contribute to a greener and more sustainable household. With a little bit of research and experimentation, you can find the perfect natural floor polish recipe that works best for your floors and budget.
DIY Natural Floor Polishes
Now comes the fun part – making your own natural floor polish! If you’re looking for a chemical-free and cost-effective solution, look no further than your own pantry. With just a few common household ingredients and a bit of elbow grease, you can easily create a floor polish that will leave your floors looking shiny and new. Here are some of our favorite DIY natural floor polishes to try out.
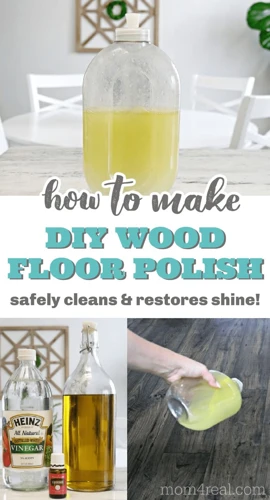
Vinegar and Olive Oil Floor Polish
Looking for a natural and effective solution to polish your floors? Try making a floor polish from vinegar and olive oil! Not only is it a cost-effective solution, but it’s also safe for your family and the environment. Here’s how to make it:
- First, gather your ingredients:
- 1/2 cup of white vinegar
- 1/2 cup of olive oil
- 1 gallon of warm water
- Next, mix the white vinegar and olive oil in a bowl until they are well-combined.
- Then, add the mixture to a gallon of warm water and stir well.
- You can also add a few drops of your favorite essential oil for a pleasant scent.
- Now your natural floor polish is ready to use!
But wait, how does it work? The vinegar cleans the floor by removing dirt and grime, while the olive oil helps to condition and shine the surface. Plus, it leaves a fresh and natural scent behind.
Before using this floor polish, it’s important to test it in a small, inconspicuous area to ensure that your floors won’t be damaged or discolored.
When you’re ready to use it, simply mop your floors as you normally would, and let the solution dry. For best results, use a microfiber mop or cloth to avoid streaking.
And that’s it! With just a few common household ingredients, you can create a safe and effective natural floor polish. So why not try it out and see the difference for yourself?
Lemon Juice and Water Floor Polish
One of the easiest natural floor polishes that you can make at home is the lemon juice and water floor polish. This recipe is especially ideal for those who wish to remove any dirt and grime from their floors while imparting a fresh, citrusy scent.
To prepare this natural floor polish, you will need the following household ingredients:
| Ingredients | Amount |
|---|---|
| Fresh lemon juice | 1/2 cup |
| Water | 1 gallon |
To make this natural floor polish:
- Mix the two ingredients in a bowl or large container.
- For best results, use warm water, which will help break down any dirt or grime on your floors.
- Dip a mop or sponge into the mixture.
- Wring out any excess liquid and begin mopping your floors in a circular motion.
The acidity of the lemon juice helps to remove dirt and stains on your floors while the water helps to dilute the lemon juice and ensure that it does not strip away any sealants on your floors. Its fresh scent will help deodorize the surfaces, leaving them with a fresh and clean smell.
It is important to note that lemon juice should not be used on floors made of natural stone, such as marble or granite. This is because the acidity of the lemon juice can etch the surfaces and cause permanent damage.
The lemon juice and water floor polish is an affordable, safe, and easy-to-make natural floor polish that can help leave your floors clean, shining, and smelling fresh.
Baking Soda and Water Floor Polish
For those looking for an all-natural floor polish that is particularly effective at removing stains, baking soda and water are a dynamic duo. This simple homemade polish is perfect for those who want to save money and avoid using harsh chemicals in their home. Follow these easy steps to make your own natural floor polish using baking soda and water:
Ingredients:
- ½ cup of baking soda
- 2 liters of warm water
Instructions:
- Mix the baking soda with the warm water until it dissolves.
- Apply the solution to your floor using a mop or a cloth.
- Scrub your floor gently to work the solution into any stains or dirt patches.
- Rinse the floor well with clean water.
- Dry the floor with a clean towel or allow it to air dry.
Baking soda is a mild abrasive and is effective at removing dirt and stains from hard floors. It can also deodorize and refresh your floors, leaving them looking and smelling clean. While this natural polish is safe to use on most hard flooring surfaces, including tile and hardwood, it is best to test it in a small area first to check for any adverse reactions. Avoid using baking soda on waxed floors, as it may remove the wax.
This natural floor polish is an excellent alternative to store-bought chemical polishes that can be harsh on your floors and on the environment. Plus, it is easy and inexpensive to make, using just two common household ingredients. Give this DIY baking soda and water floor polish a try, and enjoy the benefits of a natural, safe, and effective floor cleaning solution!
Essential Oils and Vinegar Floor Polish
To make a natural floor polish using essential oils and vinegar, you will need the following ingredients:
- Vinegar: Vinegar works as a natural cleaning agent due to its acidic nature, making it an ideal ingredient for floor polish.
- Essential oils: Essential oils not only improve the smell of your floor polish, but also have natural cleansing properties that make them a great alternative to conventional cleaners.
- Warm Water: Water is essential to help dilute the vinegar so that it is not too acidic when cleaning the floors.
Here’s how you can make the essential oils and vinegar floor polish:
- Combine 1 cup of vinegar with 20-30 drops of your favorite essential oil in a bucket.
- Add 1 gallon of warm water to the bucket and stir well to blend all the ingredients together.
- Use a clean mop to apply the floor polish to your floors.
- Rinse your mop with clean water and go over the floor once again to remove any residual cleaner.
Note: When using essential oils in cleaning products, it’s important to remember that some oils can be harmful to pets, and small children. Be sure to research the appropriate oils for your specific needs and take the necessary precautions to ensure the safety of everyone in your household.
Using this natural floor polish will not only keep your floors looking shiny and clean, but it will also leave behind a pleasant scent. Additionally, creating your own cleaning products can be more cost-effective than purchasing store-bought cleaners that can contain harmful chemicals.
Tips for Using Natural Floor Polish
Ensuring your floors remain clean and well-maintained can be a challenging task, but with the right tools and methods, it can become a breeze. When it comes to natural floor polish, there are a few essential tips that can help you make the most out of this fantastic cleaning solution. By following these guidelines, you can ensure that your floors remain shiny and clean for longer, without damaging them or leaving any harsh chemicals behind. Let’s take a closer look at some tips for using natural floor polish effectively.
Preparation
Before using any natural floor polish, it’s important to properly prepare your floors. Here are some key steps to follow:
- Clean your floors thoroughly: Remove any dirt, dust, or debris from your floors before applying the polish. This will help the polish adhere better and ensure a smoother finish.
- Test the polish on a small area: Before applying the polish to the entire floor, test it on a small, inconspicuous area to make sure it doesn’t cause any discoloration or damage.
- Choose the right polish for your floors: Different types of floors may require different types of polishes. For example, a vinegar and olive oil polish may work well on hardwood floors, but it may not be suitable for tile floors.
- Mix the polish in a clean container: Be sure to mix the natural ingredients thoroughly in a clean container before applying. This will help ensure a consistent application.
By taking these preparation steps, you can ensure that your floors are properly prepared for the natural floor polish and that you achieve the best possible results.
Application
When it comes to applying natural floor polish to your floors, there are a few important steps to keep in mind. Here’s a breakdown of the application process:
| Step 1: | Ensure that your floor has been thoroughly cleaned and dried. Any debris or dirt left on the surface could cause damage to your floors. |
| Step 2: | Mix your chosen natural floor polish ingredients together in a bowl or spray bottle. |
| Step 3: | Apply the polish to a small area of your floor, using either a mop or a soft cloth. Make sure to apply the polish evenly, and avoid using too much at once. |
| Step 4: | Allow the polish to sit on the surface of your floors for a few minutes. |
| Step 5: | Using a clean mop or cloth, gently buff the surface of your floors until they shine. |
| Step 6: | Repeat steps 3-5 until you have covered your entire floor surface. |
It’s important to note that different natural floor polishes may require different application methods, so be sure to refer to the specific instructions provided for your chosen polish. Additionally, it’s always a good idea to test a small area of your floors with the polish before applying it to the entire surface, just to be sure that it doesn’t cause any damage or discoloration.
Storage
When it comes to storing your natural floor polish, it’s important to keep a few things in mind. Firstly, all homemade cleaning products should be kept out of reach of children and pets. Secondly, it’s best to store your polish in a cool, dry place, away from direct sunlight. Here are a few tips for storing your DIY natural floor polishes:
- Label your container: Make sure to label your container with the name of the polish and the date it was made. This will help you keep track of how long the polish has been sitting around, and ensure that you use it up before it goes bad.
- Check for separation: Some natural floor polishes can separate over time, so it’s important to give the container a good shake before using. If you notice that the polish has separated and won’t mix back together, it’s time to make a new batch.
- Use glass or metal containers: Some natural ingredients can react with plastic, so it’s best to use glass or metal containers to store your floor polish.
- Avoid exposure to air: Exposure to air can cause some natural ingredients to oxidize and lose their potency. To prevent this, make sure to close the container tightly after each use.
- Store in a low-traffic area: Natural floor polishes can be slippery when wet, so it’s best to store your containers in a low-traffic area where they won’t get knocked over or spilled.
By following these simple tips, you can help extend the life of your natural floor polish and ensure that it stays effective until the last drop.
Conclusion
When it comes to natural floor polish, there are many options available that are safe, chemical-free, and cost-effective. By using common household ingredients such as vinegar, olive oil, lemon juice, baking soda, and essential oils, you can make your own DIY floor polishes that are just as effective as store-bought products.
Not only are these natural floor polishes good for your health and the environment, but they can also save you money in the long run. Traditional floor cleaning products can be expensive and filled with harmful chemicals that can be dangerous to pets and children. By making your own natural floor polish, you can be sure that you are using safe ingredients that won’t harm your family or the planet.
However, it’s important to keep in mind that natural floor polish may not work as quickly or effectively as chemical-based options, especially on heavily soiled floors. It may require a bit more elbow grease and patience, but the end result is worth it in terms of safety and cost-effectiveness.
In conclusion, making your own natural floor polish is a simple and affordable way to keep your floors clean and looking their best. With a little bit of preparation and some common household ingredients, you can create a natural floor polish that is safe, effective, and good for the environment. So, why not give it a try and see the difference for yourself? Your family and your wallet will thank you.
Frequently Asked Questions
What types of flooring can I use natural floor polish on?
You can use natural floor polish on a variety of flooring types including hardwood, laminate, linoleum, and tile.
Can I use natural floor polish on my newly installed floors?
You should wait at least a few weeks before using natural floor polish on new floors to allow them to settle and fully cure.
Will natural floor polish leave residue on my floors?
No, if properly applied, natural floor polish should not leave any residue on your floors.
Do I need to strip my floors before using natural floor polish?
It depends on the condition of your floors. If there is a build-up of wax or other products, it’s recommended to strip the floors before using natural floor polish.
Can I use natural floor polish on floors with a waxed finish?
No, natural floor polish should not be used on floors with a waxed finish. It could damage the finish and cause it to become slippery.
Will natural floor polish protect my floors from scratches?
Natural floor polish can help protect your floors from minor scratches, but it is not a replacement for regular maintenance and care.
Why is it important to use natural floor polish?
Natural floor polish is important because it is safer for your family and pets, environmentally-friendly, and cost-effective compared to traditional chemical-based floor polishes.
How often should I use natural floor polish on my floors?
It is recommended to use natural floor polish every few months, depending on the amount of foot traffic in your home.
Can I mix different natural floor polish recipes together?
No, it’s not recommended as the ingredients and measurements of each recipe are specific for optimal performance.
Can I use natural floor polish on commercial or high-traffic floors?
It’s recommended to consult with a professional before using natural floor polish on commercial or high-traffic floors as they may require more frequent maintenance and specialized products.