Introduction
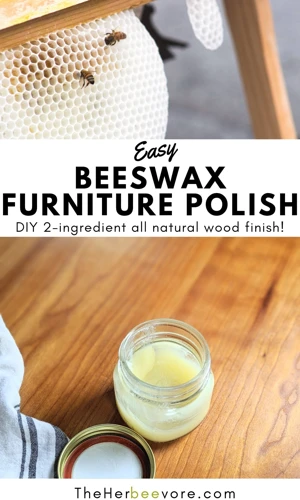
Have you ever wondered how to enhance the look of your wooden furniture without resorting to harsh chemical-laden polishes? If so, you may want to try making your own beeswax wood polish. This natural alternative to store-bought versions is easy to prepare, cost-effective, and environmentally-friendly. In this article, we’ll guide you through the benefits of making beeswax wood polish yourself, the essential ingredients and tools needed, and provide step-by-step instructions to help you create your own blend. Plus, we’ll share some tips for using and maintaining your newly polished furniture. So let’s jump right in and discover how to create a lustrous shine on your wooden surfaces with all-natural beeswax polish!
What is Beeswax Wood Polish and Why Use it?
Beeswax wood polish is a natural alternative to store-bought wood polish that is made from a combination of beeswax and oil. The beeswax creates a protective layer on the wood while the oil nourishes and moisturizes it. This type of wood polish has been used for centuries due to its ability to protect and repair wooden surfaces.
Why should you use Beeswax Wood Polish?
1. Natural ingredients: Beeswax wood polish is made with natural ingredients that are safe to use and environmentally friendly. Unlike commercial wood polish, which contains chemicals that can be harmful to your health and the environment, beeswax wood polish is a natural and non-toxic alternative.
2. Protective coating: Beeswax wood polish forms a protective layer on the surface of the wood, preventing moisture from penetrating the wood and causing damage. This coating helps to preserve the natural beauty of the wood and prevents it from becoming dull or discolored over time.
3. Restorative properties: Beeswax wood polish contains natural oils that help to nourish and moisturize the wood. This can help to repair minor scratches, scuffs, and other imperfections on the surface of the wood, making it look brand new once again.
4. Cost-effective: Making your own beeswax wood polish can be less expensive than purchasing commercial wood polish. All the ingredients used in making beeswax wood polish are readily available and relatively affordable.
If you want to explore more natural alternatives to store-bought polish, you can also try making your own homemade furniture polish with essential oils, a natural floor polish with common household ingredients, an eco-leather polish, or a scented polish spray for stainless steel.
Benefits of DIY Beeswax Wood Polish
Making your own beeswax wood polish is not only a fun DIY project, but it also offers a variety of benefits that you won’t find with store-bought polish. By using this all-natural alternative, you can feel confident that you are making a positive impact on the environment, saving money, and avoiding harsh chemicals. Plus, the process is simple and the results of your homemade polish will leave your furniture and wood surfaces looking beautiful. So, let’s explore the benefits of DIY Beeswax Wood Polish in more detail.
Environmentally Friendly
Making your own beeswax wood polish is a great way to have a positive impact on the environment. When you use store-bought wood polish, you are using potentially harmful chemicals that can pollute the air and water. Additionally, the plastic containers used to store the wood polish are not eco-friendly and add to the ever-increasing problem of plastic waste.
On the other hand, making your own wood polish with natural ingredients like beeswax can greatly reduce your environmental impact. Beeswax is a natural, sustainable, and biodegradable material. Also, the other materials needed to make the polish (such as olive oil and essential oils) are typically readily available in eco-friendly, reusable containers.
Making your own beeswax wood polish is an excellent alternative to using traditional store-bought wood polish which may contain harmful chemicals that can be destructive to the environment. If you want to take further actions in making your own eco-friendly cleaning products at home, check out our articles on homemade furniture polish with essential oils, natural floor polish with common household ingredients, eco-friendly leather polish, and scented polish spray for stainless steel.
Cost-Effective
When it comes to household expenses, cost-effectiveness is always a factor to consider. Store-bought wood polishes can be expensive, especially if you use them frequently to maintain your furniture’s shine. However, making your own beeswax wood polish at home can save you some money in the long run.
Let’s take a closer look at the cost savings of DIY beeswax wood polish compared to store-bought wood polishes. The following table provides a general comparison, but keep in mind that prices may vary depending on your location and the brands available.
| Item | Store-bought wood polish | DIY beeswax wood polish |
|---|---|---|
| Beeswax | N/A | Approximately $10 for 1 pound |
| Mineral oil | Approximately $5 for 16 ounces | Approximately $6 for 16 ounces |
| Vinegar | Approximately $3 for 32 ounces | Approximately $3 for 32 ounces |
| Essential oils | Approximately $10 for 0.5 ounces | Approximately $10 for 2 ounces |
| Total Cost | Approximately $18 for 16 ounces | Approximately $29 for 16 ounces (with extra beeswax and essential oils remaining for future use) |
From the table above, we can see that the initial cost of DIY beeswax wood polish may seem higher than store-bought wood polish. However, keep in mind that with the leftover beeswax and essential oils, you can make several batches of wood polish in the future, which will ultimately reduce your overall costs.
The ingredients for DIY beeswax wood polish are readily available in most stores and can be purchased in bulk, which will reduce the cost even more. Plus, since you only need to use a small amount of the DIY wood polish with each application, a little goes a long way, and you won’t need to purchase it as frequently as store-bought wood polish.
The cost-effectiveness is one of the many benefits of making your own beeswax wood polish at home. Not only will it save you money, but you’ll also have peace of mind knowing you’re using natural ingredients and reducing your environmental impact.
Natural Ingredients
One of the major reasons why people choose to make their own beeswax wood polish is because it contains 100% natural ingredients. Beeswax is a natural substance that is obtained from honey bees, while other natural ingredients such as olive oil and essential oils can be used in the recipe as well.
Using natural ingredients means that you can avoid the potential harmful chemicals found in store bought furniture polish. Many commercial wood polishes contain toxic chemicals such as formaldehyde and petroleum distillates, which can pose a risk to both your health as well as the environment. These chemicals can create a buildup on furniture over time, leaving behind a greasy residue and preventing the wood from breathing properly.
Making your own beeswax wood polish is a great way to ensure that your furniture gets the protection it needs without any harmful risks. Plus, you’ll feel good knowing that you’re using sustainable, non-toxic ingredients that won’t harm the environment during production or disposal.
If you’re looking for a way to add shine to your wooden furniture that’s safe, natural and affordable, then making your own beeswax wood polish is the way to go. Keep reading to learn how to make it yourself!
How to Make DIY Beeswax Wood Polish
Are you tired of using store-bought wood polish that contains harsh chemicals and expensive additives? If so, making your own beeswax wood polish can be a cost-effective and environmentally friendly alternative. Not only does it use natural ingredients, but it can also provide a unique shine to your furniture. Here’s a step-by-step guide with all the necessary materials and instructions for making your very own DIY beeswax wood polish.
Materials Needed
To make your own DIY beeswax wood polish, you’ll need a few simple ingredients. Here are the materials that you’ll need:
| Materials | Amount |
| Beeswax pellets or grated beeswax | 1 cup |
| Coconut oil or olive oil | 1/2 cup |
| Vitamin E oil (optional) | 1 tsp |
| Essential oil (optional) | 5-10 drops |
| Glass jar or tin can | 1 |
| Pot or double boiler | 1 |
| Grater (if using a beeswax block) | 1 |
| Stirring tool (such as a wooden stick or spoon) | 1 |
Beeswax is the primary ingredient of this polish, giving it its unique shine and natural protective qualities. You can use either beeswax pellets or grated beeswax. Coconut oil or olive oil are used to soften and moisturize the wood, and to help spread the wax evenly. Vitamin E oil and essential oil are optional ingredients that can help condition the wood and add a pleasant scent. A glass jar or tin can is needed to store your DIY polish, and a pot or double boiler will be used to melt the beeswax and oils. Finally, a grater and stirring tool are also needed, depending on whether you use pellets or a block of beeswax. With these simple materials, you can easily create your own beeswax wood polish at home.
Step-by-Step Instructions
To make your own DIY Beeswax Wood Polish, follow these simple step-by-step instructions:
Materials Needed:
- Beeswax
- Olive Oil (or any other food-grade oil of your choice)
- Double Boiler (or a heatproof bowl and saucepan)
- Clean Cloth or Cheesecloth
- Container for storing the finished polish
Step 1: Grate or chop the beeswax into small pieces. This will help it to melt evenly.
Step 2: Place the beeswax in the top of the double boiler (or heatproof bowl) and add enough olive oil to cover it.
Step 3: Heat the water in the bottom of the double boiler (or the saucepan). The steam from the boiling water will gently heat the top pot or bowl and melt the beeswax.
Step 4: Stir the mixture until the beeswax has completely melted and combined with the oil.
Step 5: Remove the pot or bowl from the heat and let it cool slightly.
Step 6: Pour the mixture through a clean cloth or cheesecloth into a container to remove any impurities or bits of beeswax that have not melted.
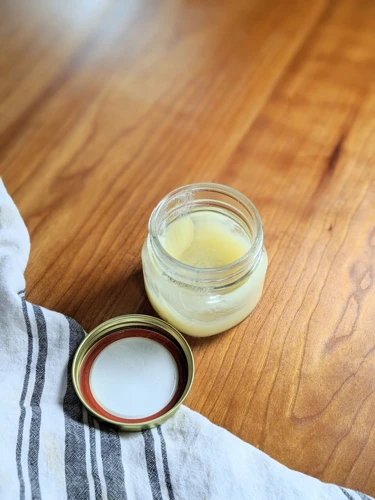
Step 7: Let the mixture cool completely and solidify.
Congratulations! You have made your own DIY Beeswax Wood Polish. Store it in a cool, dry place until you are ready to use it.
Note: It is important to use a food-grade oil, like olive oil, in the mixture to ensure that it is safe to use on surfaces where food will be prepared or consumed.
Using Beeswax Wood Polish on Furniture
After crafting your own DIY Beeswax Wood Polish, you’ll want to put it to use and see the stunning results. By using this natural alternative to store-bought polish, not only will your furniture gain a brilliant shine, but it will also stay healthy and protected for years to come. In this section, we’ll walk you through the steps of preparing and applying beeswax polish to ensure optimal results. Get ready to witness the transformative power of this simple yet effective DIY solution.
Preparation
Before applying the DIY Beeswax Wood Polish, it is important to properly prepare the furniture surface. Following these preparation steps will ensure the best results:
- Clean the Surface: Wipe down the furniture with a damp cloth to remove any dust, dirt, or debris. Let the surface dry completely before proceeding to the next step.
- Sand the Surface: If the furniture has any rough spots or imperfections, use a fine-grit sandpaper to smooth the surface. Be sure to sand with the grain of the wood and wipe away any dust with a clean cloth.
- Test the Polish: Before applying the polish to the entire surface, test it on a small, inconspicuous area first to make sure it will not discolor or damage the wood.
- Protect Surrounding Areas: To protect surrounding areas from the polish, lay down newspaper or a drop cloth underneath the furniture.
Proper preparation will help the DIY Beeswax Wood Polish adhere to the furniture surface and create a smooth, even finish. By following these steps, you will ensure a long-lasting and beautiful shine for your furniture.
Application
Applying beeswax wood polish is a simple process that can make a big difference in the appearance and longevity of your furniture. Here are the steps for applying it:
- Clean the surface: Before application, make sure the surface of the furniture is clean and free of dust and debris.
- Test on a small area: Apply the polish on a small, inconspicuous area first to make sure you like the results.
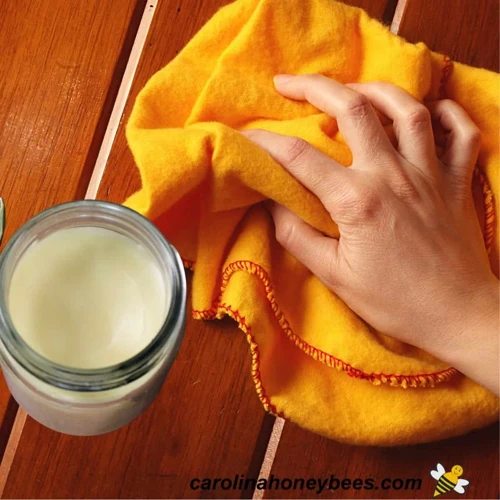
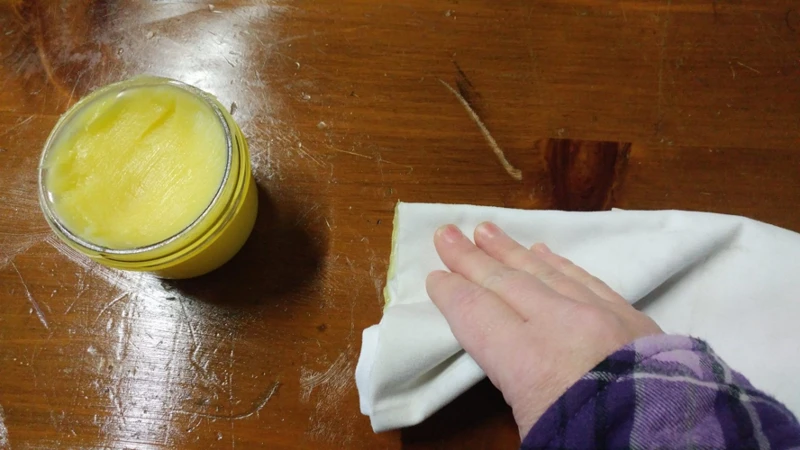
- Scoop out a small amount of polish: Using a soft cloth or sponge, scoop out a small amount of the beeswax wood polish.
- Apply the polish: Rub the polish onto the surface of the furniture, using a circular motion. Make sure to cover the entire surface of the furniture with a thin layer of polish.
- Let the polish dry: Allow the polish to dry for at least 15-20 minutes, or until it feels dry to the touch.
- Buff: Using a clean, dry cloth, buff the surface of the furniture until it shines.
- Repeat as needed: For best results, repeat the process of application and buffing until you achieve the desired shine.
It is important to note that beeswax wood polish may not work as well on certain types of furniture, such as those with a glossy finish or those that are heavily scratched. Additionally, overapplication of the polish can result in a buildup that is difficult to remove. Use the polish sparingly and follow the instructions closely to ensure the best results.
Tips for Maintaining Your Furniture’s Shine
After you apply your DIY Beeswax Wood Polish and see the beautiful shine it brings to your furniture, you’ll want to maintain that shine for as long as possible. Here are some tips to help you do just that:
Avoid Excessive Sunlight
Direct sunlight can cause the finish on your furniture to fade or even crack. Avoid placing your furniture in areas that receive a lot of direct sunlight, or use window treatments to block out the sunlight.
Use Coasters and Placemats
Prevent water rings and stains on your furniture by using coasters and placemats. This will protect the wood from moisture and spills and prevent damage to the finish.
Dust Regularly
Dust can settle on your furniture and make it look dull. Dusting regularly with a soft, dry cloth will help keep your furniture looking shiny and new.
Keep Away from Heat Sources
Placing your furniture too close to heat sources like radiators or fireplaces can cause the wood to dry out and the finish to crack. Keep your furniture at a safe distance from heat sources to keep it looking beautiful.
Avoid Harsh Chemicals
Harsh chemicals like ammonia or bleach can damage the finish on your furniture. Stick to mild cleaning solutions like homemade wood cleaner or gentle soap and water.
By following these simple tips, you can help preserve the shine and beauty of your furniture and enjoy it for years to come.
Conclusion
In conclusion, making DIY beeswax wood polish is a simple yet effective way to not only rejuvenate your furniture, but also take a step towards a more natural and eco-friendly lifestyle. By using natural ingredients, you can avoid harmful chemicals that are often found in store-bought polishes. Plus, it is cost-effective and only requires a few basic tools and materials.
Once you have made your own beeswax wood polish, the benefits will be clear. Your furniture will have a renewed shine and you can rest easy knowing that you have not harmed the environment in the process. Plus, with the proper maintenance and care, the shine of your furniture can be maintained for years to come.
So why not give DIY beeswax wood polish a try? Not only will you be doing your part for the environment, but you will also have the satisfaction of creating something with your own hands that has practical value in your home. With just a few simple steps, you can add natural beauty and shine to your furniture and enjoy it for years to come.
Frequently Asked Questions
What makes beeswax wood polish a better alternative to store-bought polish?
Beeswax wood polish is a natural, environmentally friendly and cost-effective alternative to store-bought polish. It also nourishes and protects wood in a way that other polishes cannot.
How much does it cost to make DIY beeswax wood polish?
The cost of making beeswax wood polish depends on the quantity of ingredients you use and where you purchase them. However, making your own polish is usually cheaper than buying store-bought polish.
Can I use any type of wax in beeswax wood polish?
No, it is important to use only natural beeswax in DIY beeswax wood polish for optimal results. Other types of wax may not provide the same nourishing and protective benefits to wood.
Is making DIY beeswax wood polish time-consuming?
Not at all! Making DIY beeswax wood polish is a quick and easy process that can be done in under an hour.
Can DIY beeswax wood polish be used on all types of wood?
Yes, DIY beeswax wood polish can be used on all types of wood. However, it is always best to test the polish on a small, inconspicuous area before applying it to the entire surface.
Will DIY beeswax wood polish leave a greasy residue?
No, if applied correctly, DIY beeswax wood polish should not leave a greasy residue on your furniture. It will leave a smooth and shiny finish.
Will DIY beeswax wood polish damage the environment?
No, DIY beeswax wood polish is an environmentally friendly alternative to store-bought polish. It uses natural ingredients and does not contain any harmful chemicals.
How often should I apply beeswax wood polish to my furniture?
It depends on how frequently your furniture is used. A general rule of thumb is to apply beeswax wood polish once every 1-3 months to maintain its shine and protection.
Can I use a cloth to apply beeswax wood polish?
Yes, a lint-free cloth is the best way to apply beeswax wood polish to your furniture. It will help distribute the polish evenly and prevent any streaks or smudges.
Is DIY beeswax wood polish safe for children and pets?
Yes, since DIY beeswax wood polish is made with natural ingredients, it is safe for children and pets. However, it is always best to keep them away from freshly polished furniture until the polish has fully dried.